Backups
Backups allow for easy and safe storage of own non-shared records in the account for safe keeping. In the eventuality of having lost some information, backups can be used for restoring the personal records using the content that was stored in the backed up file.
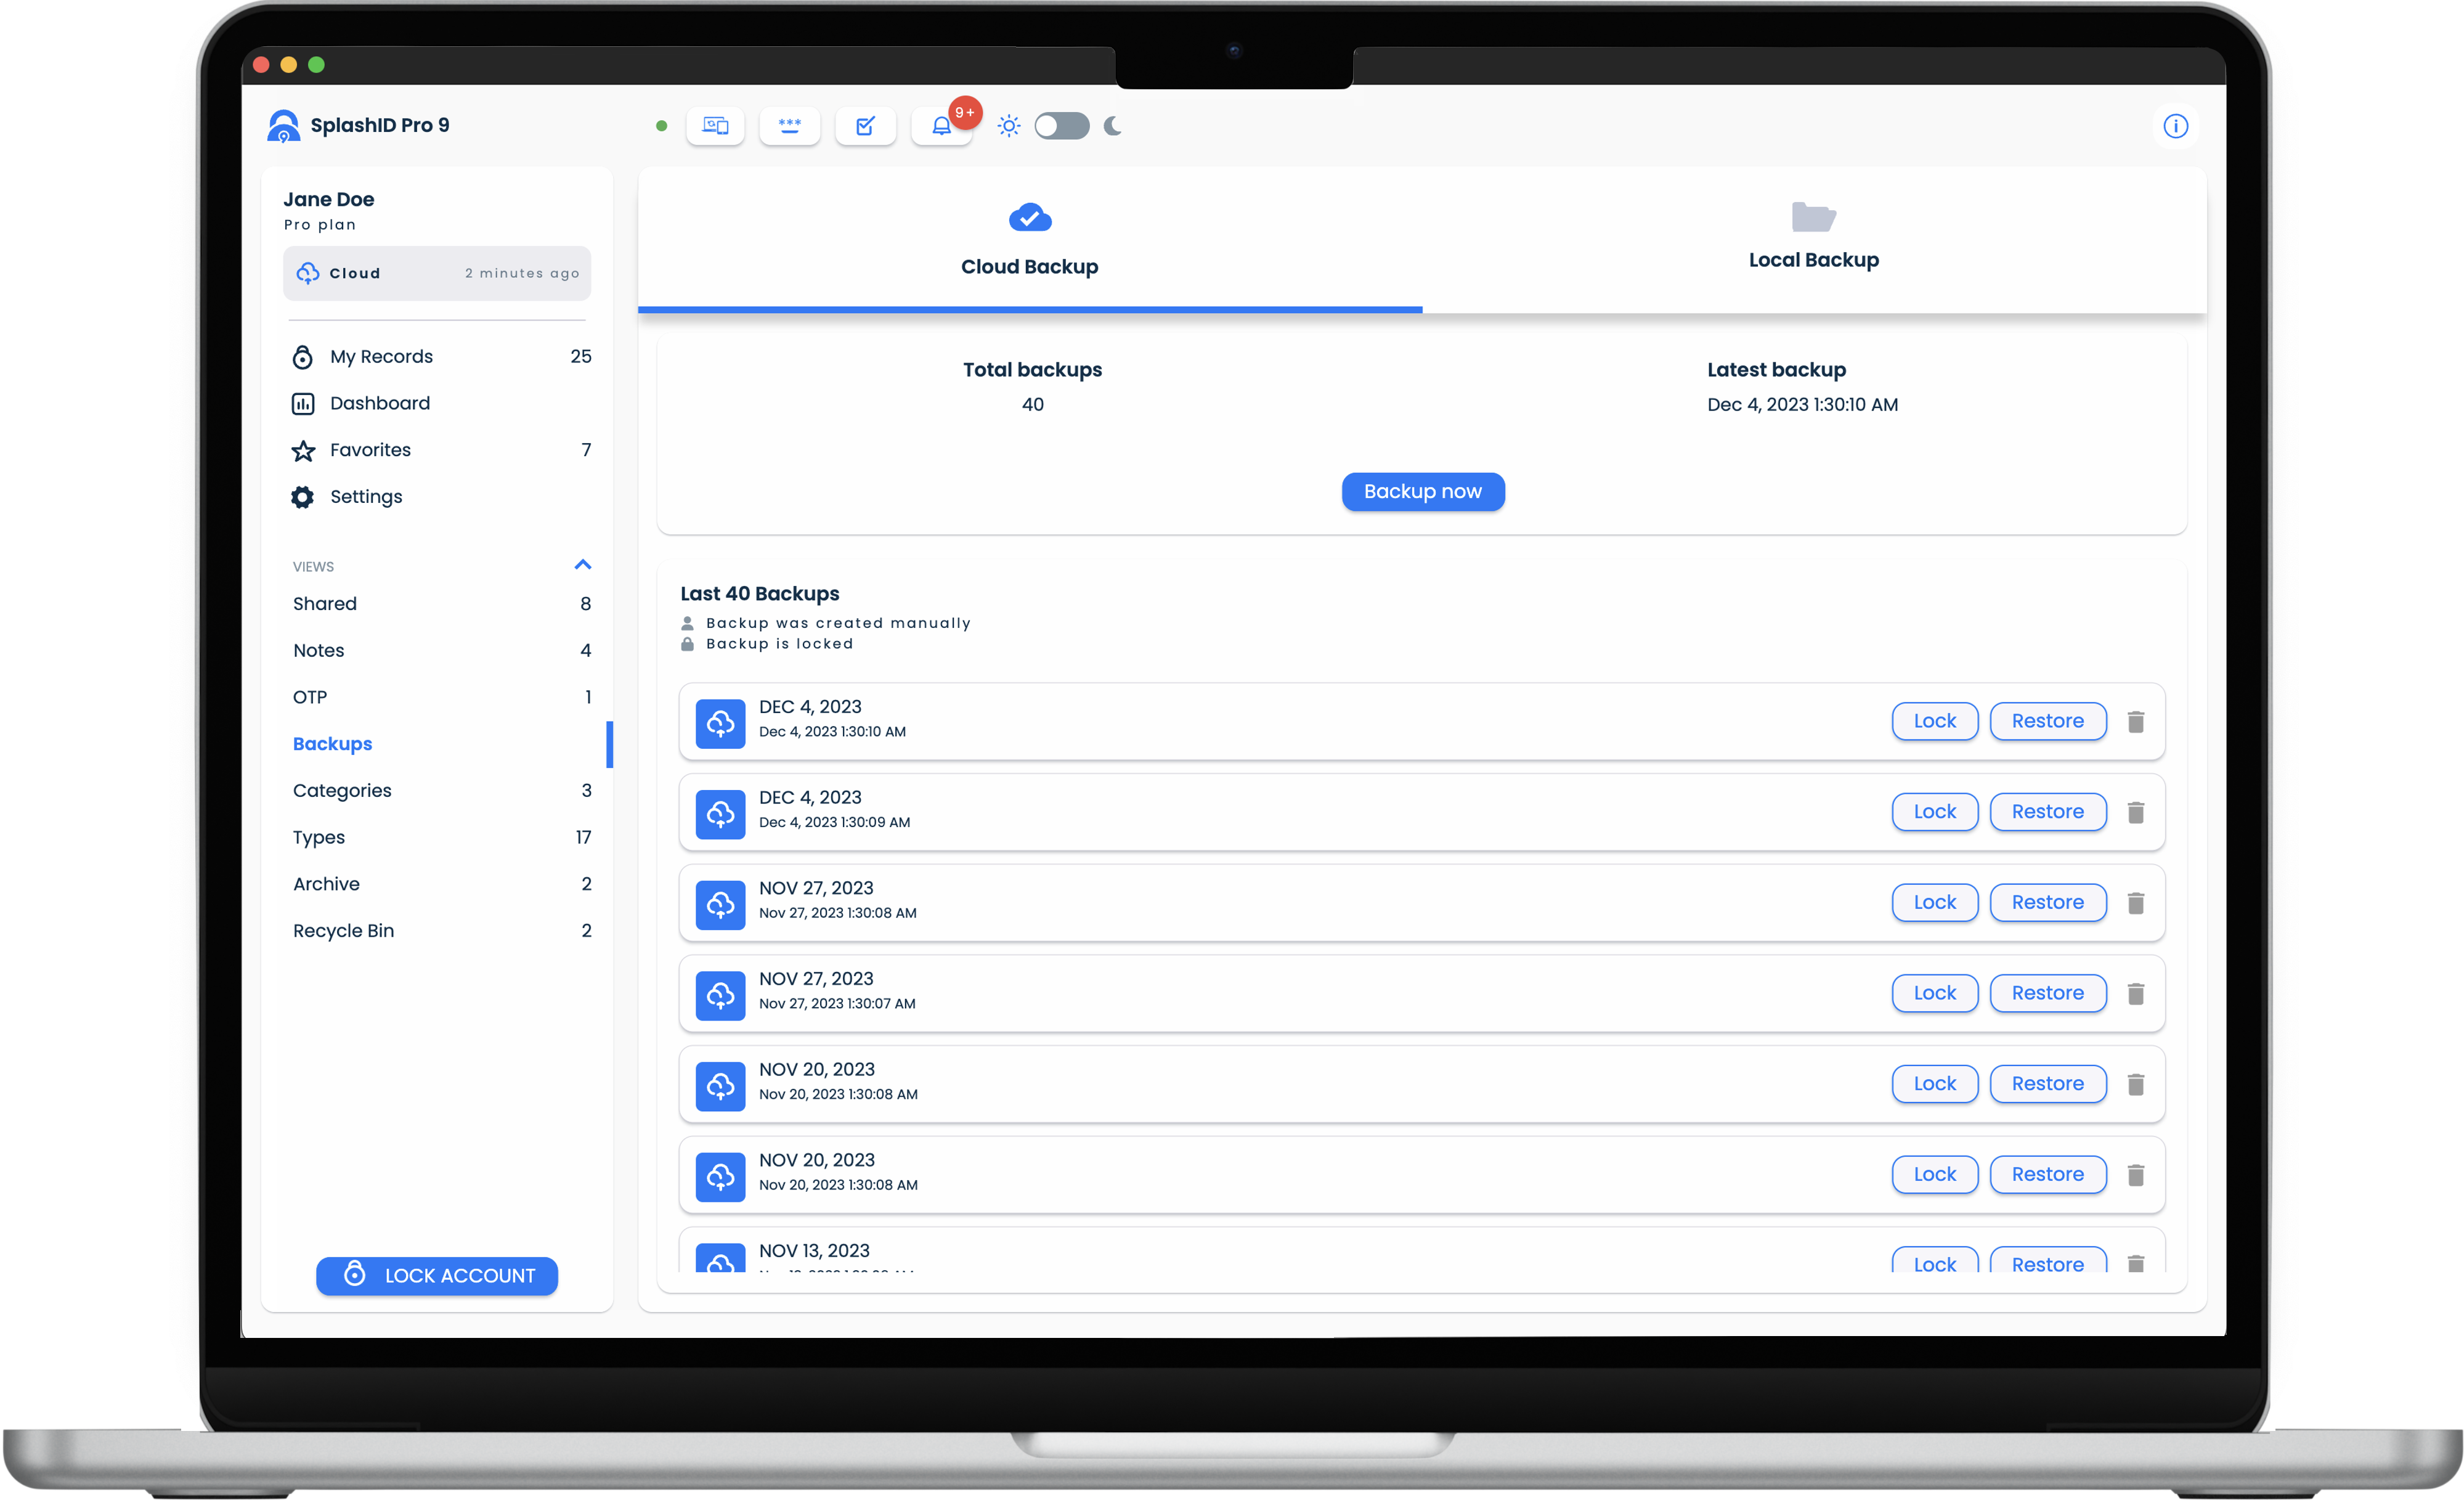
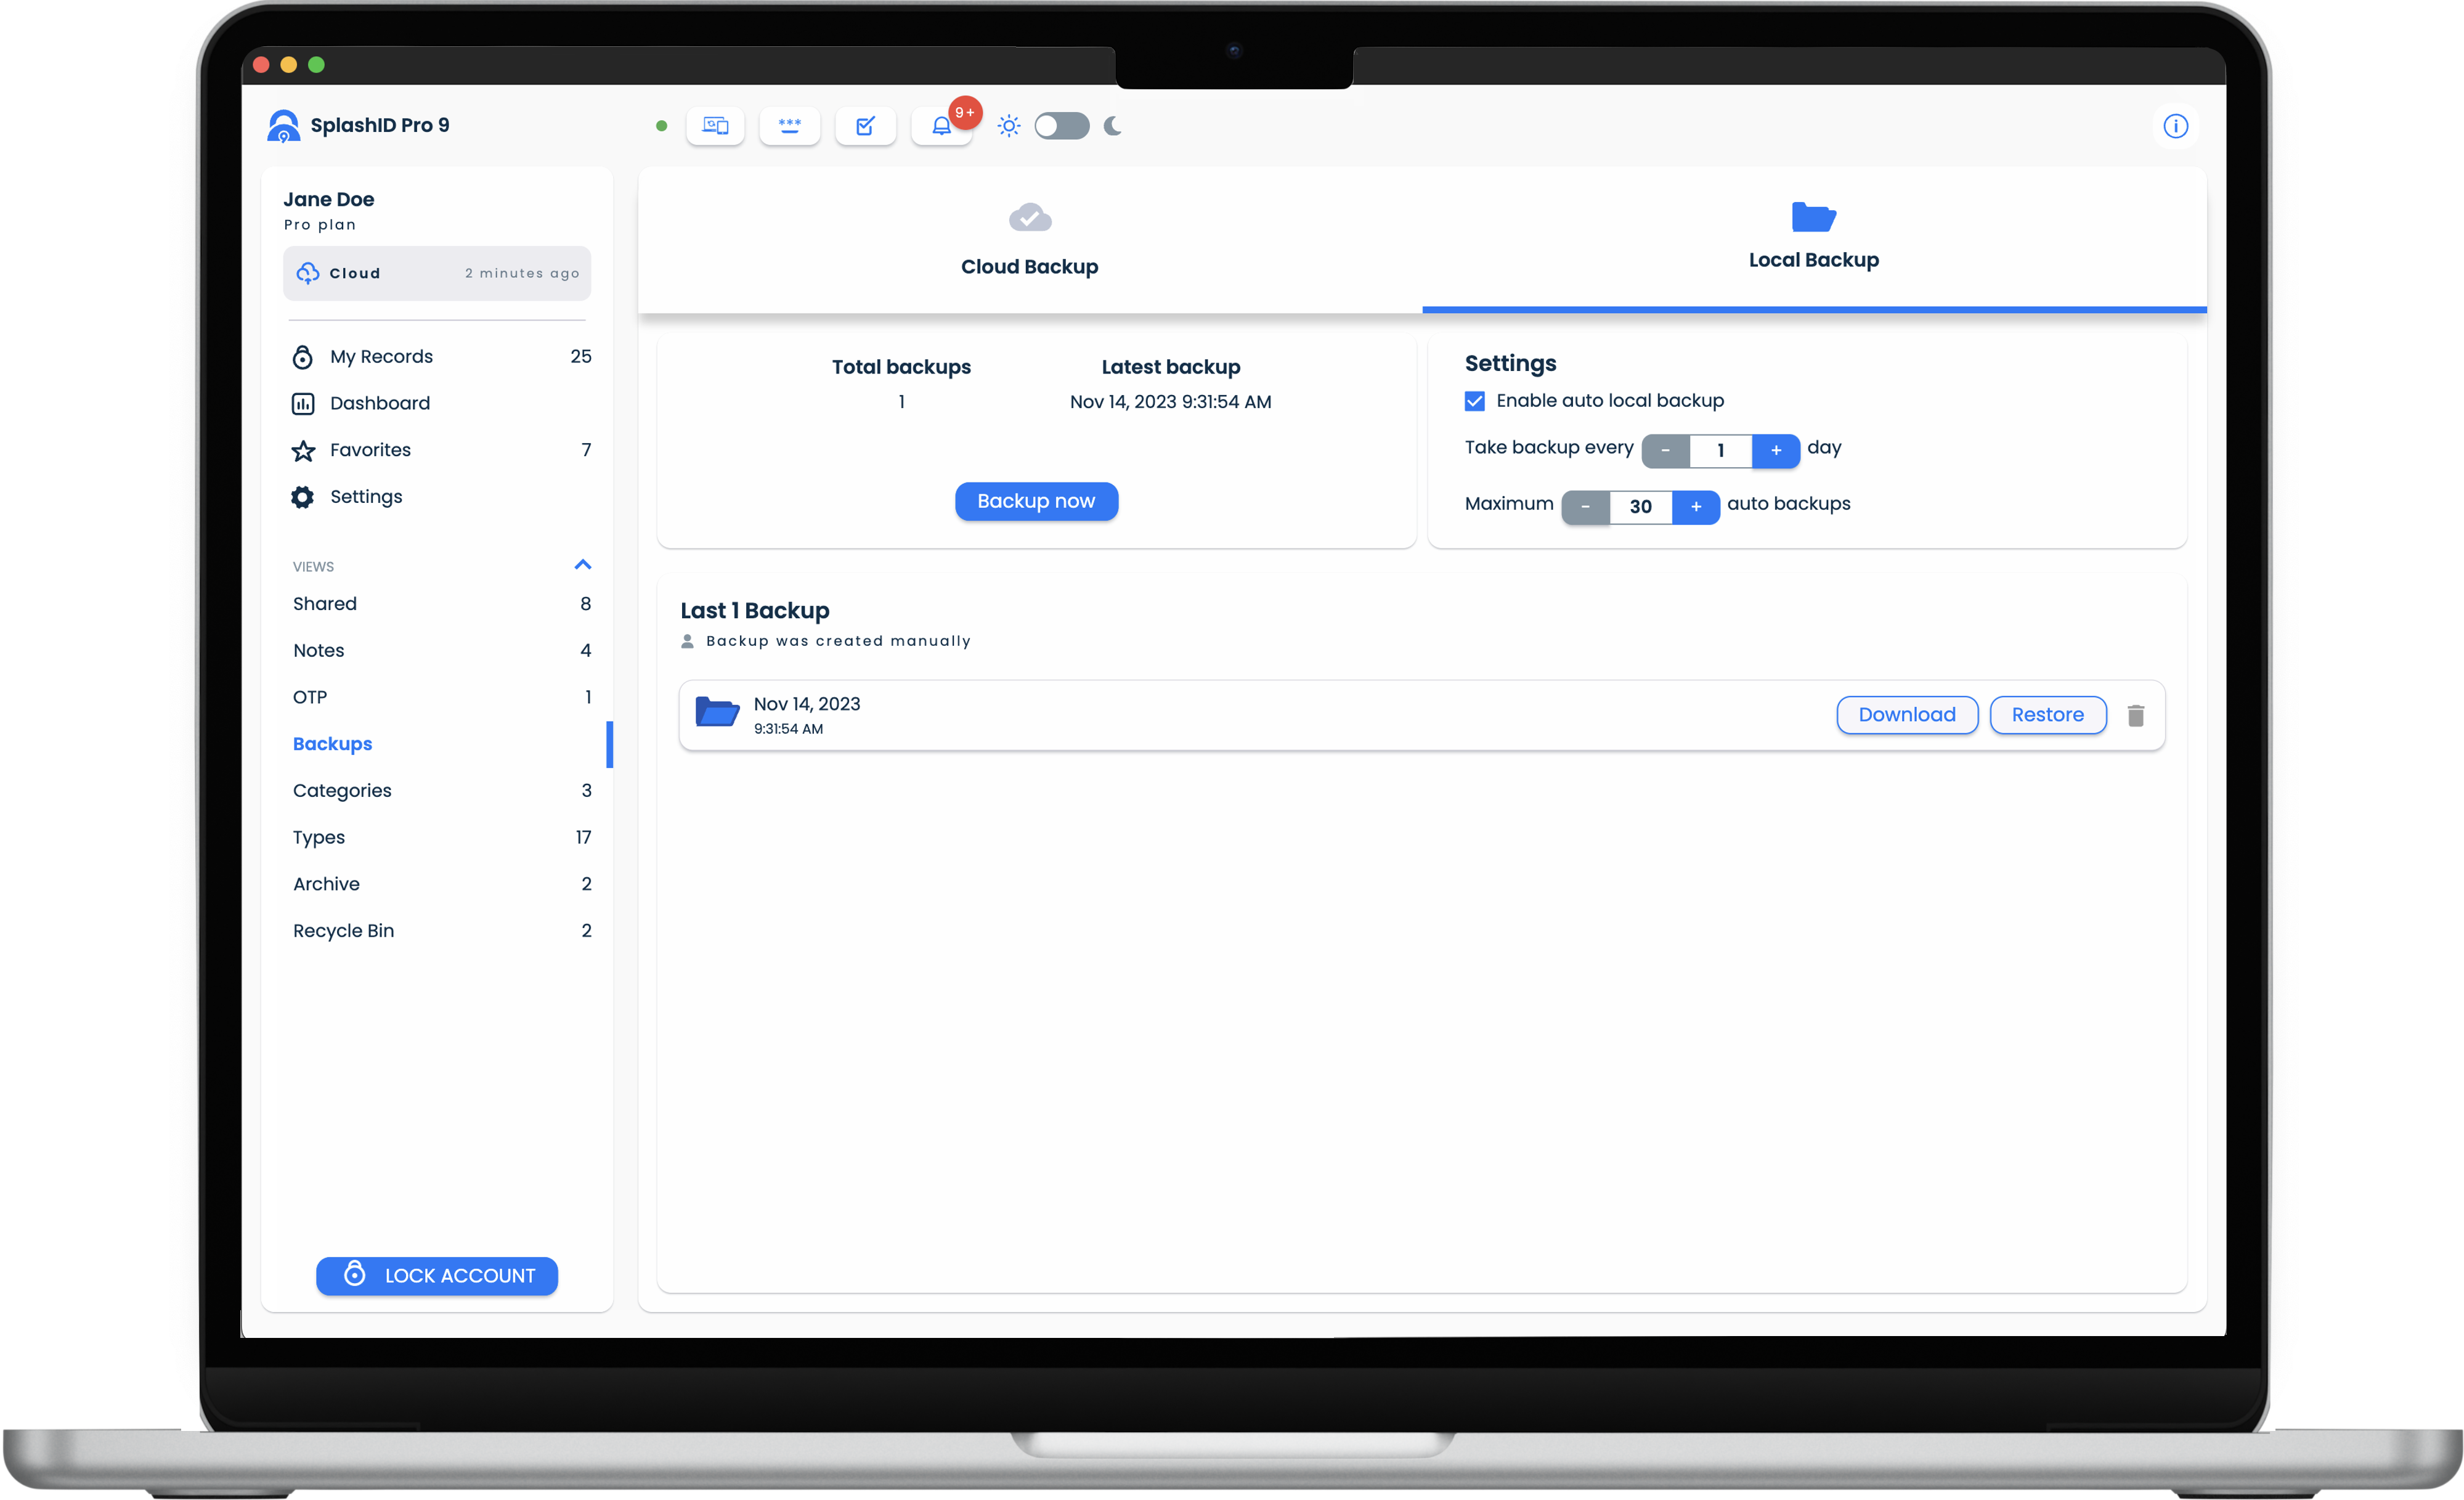
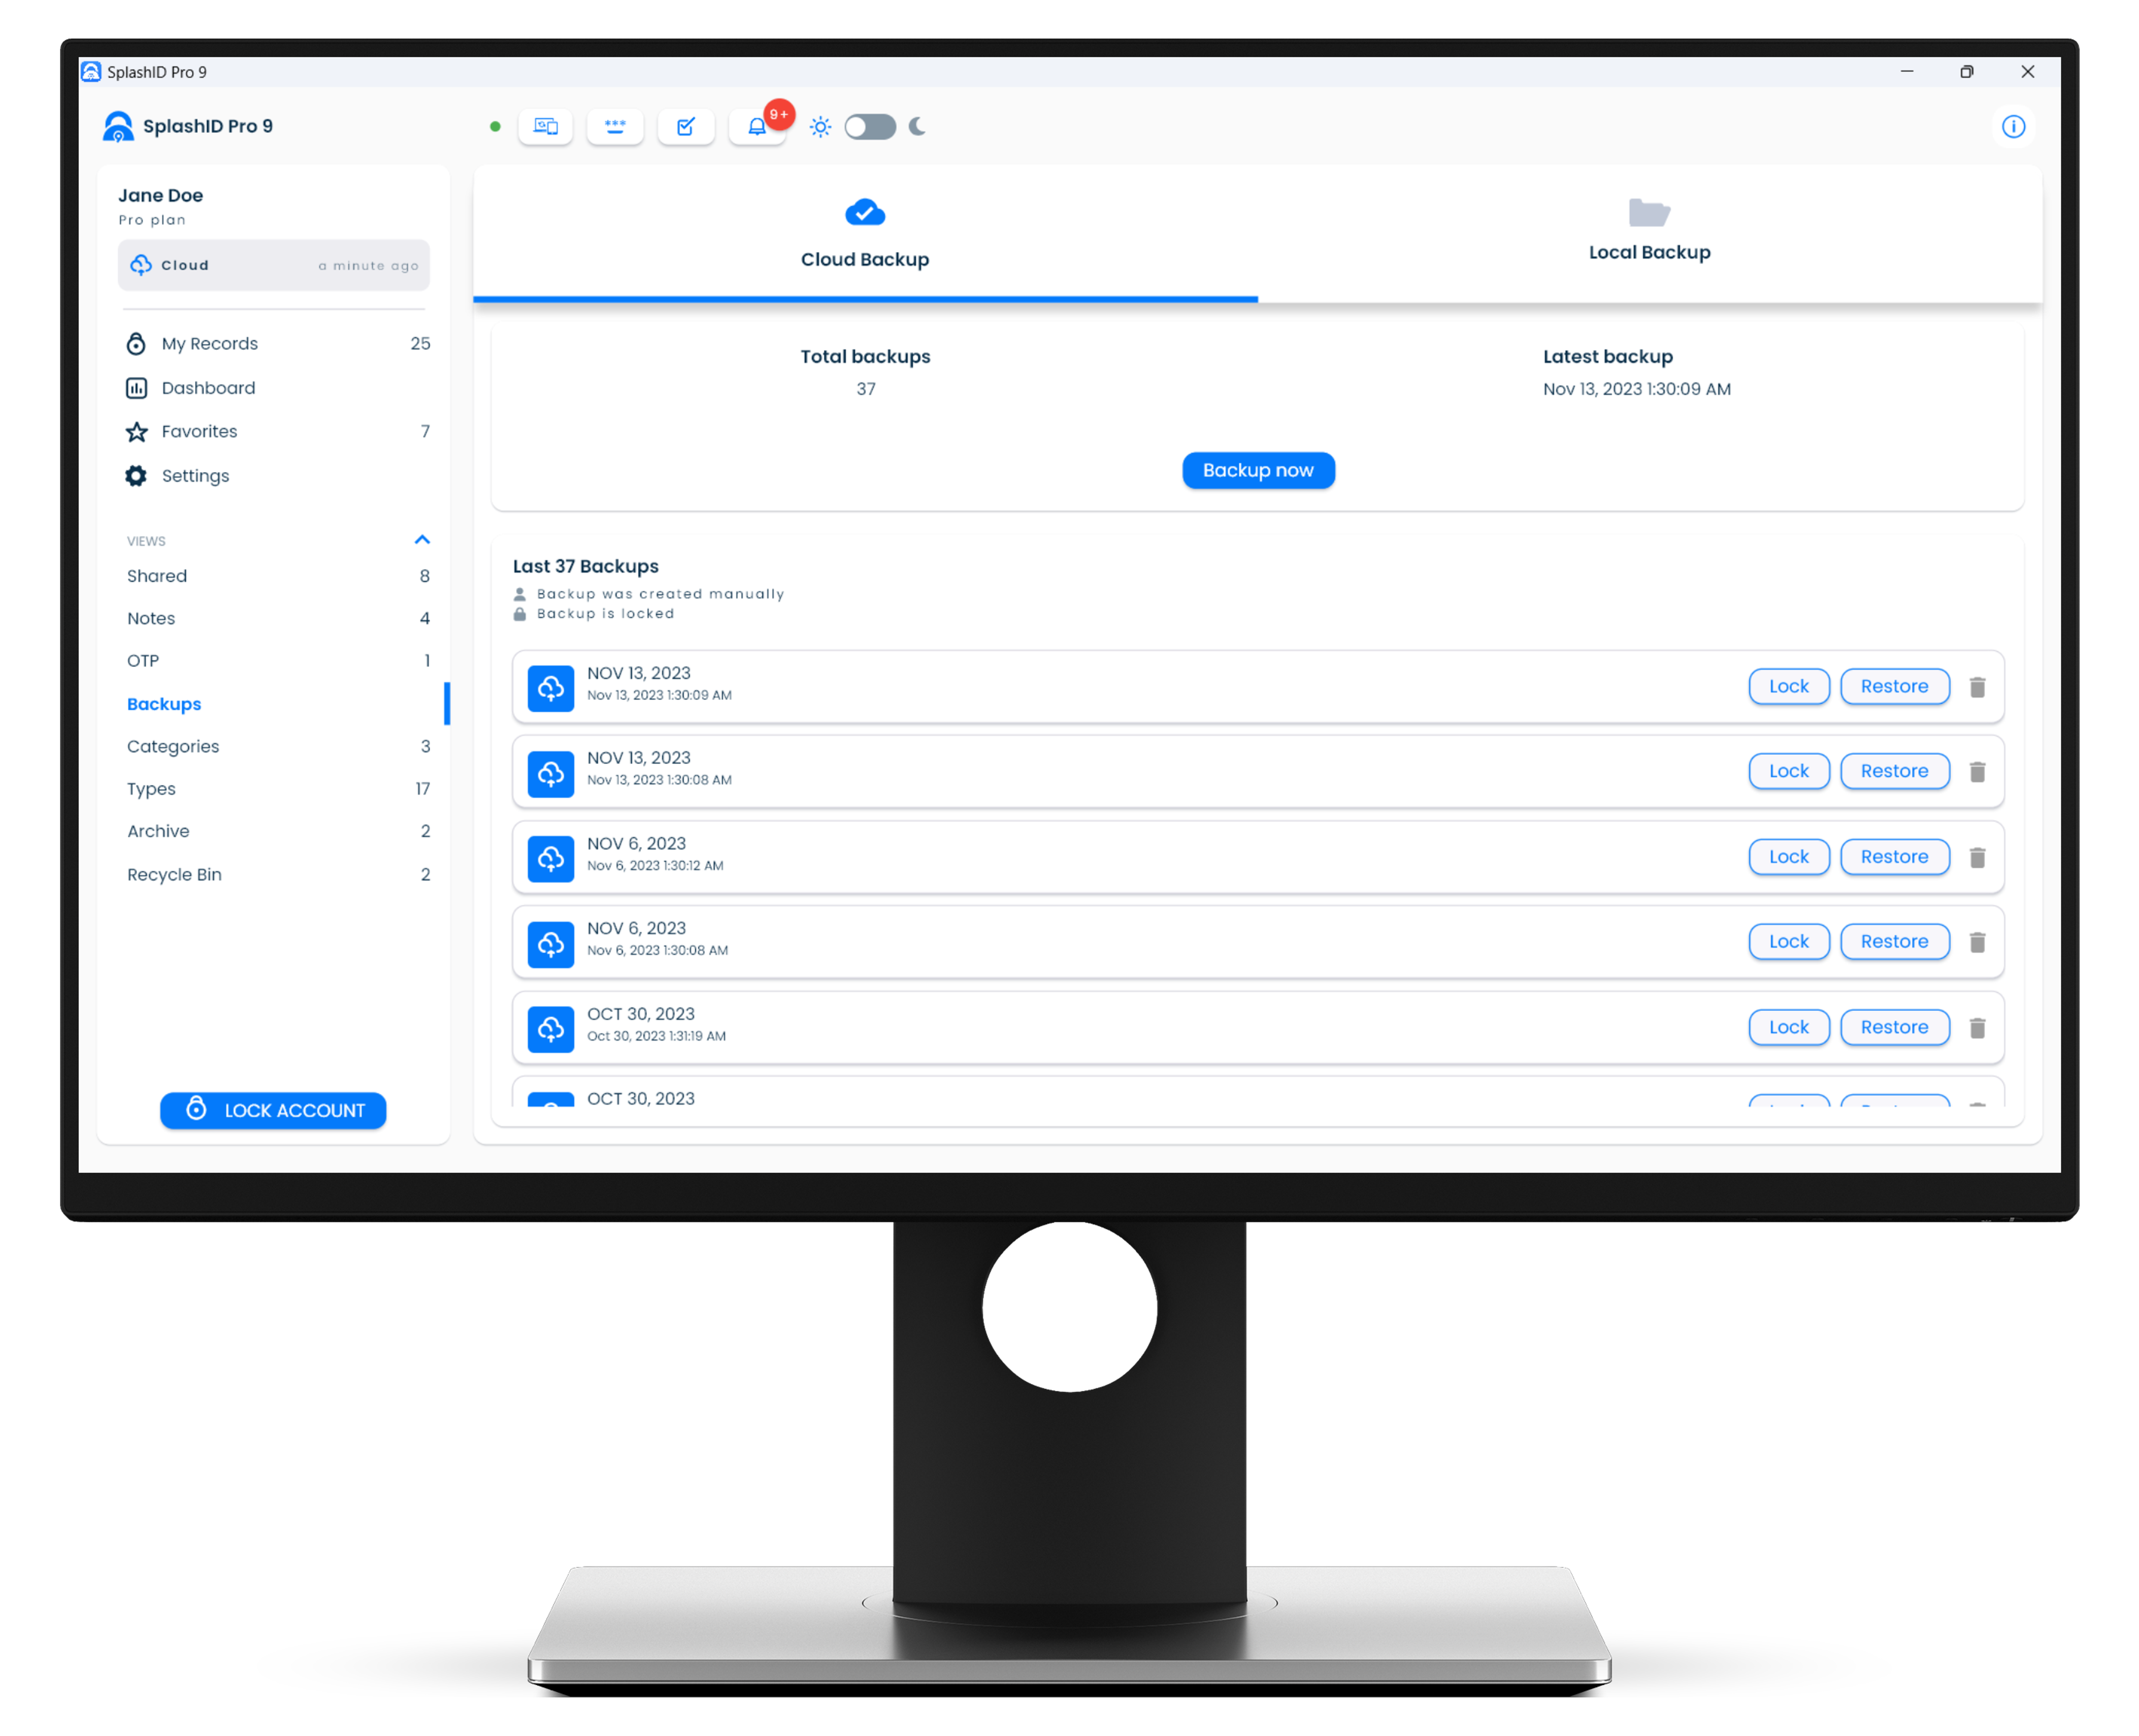
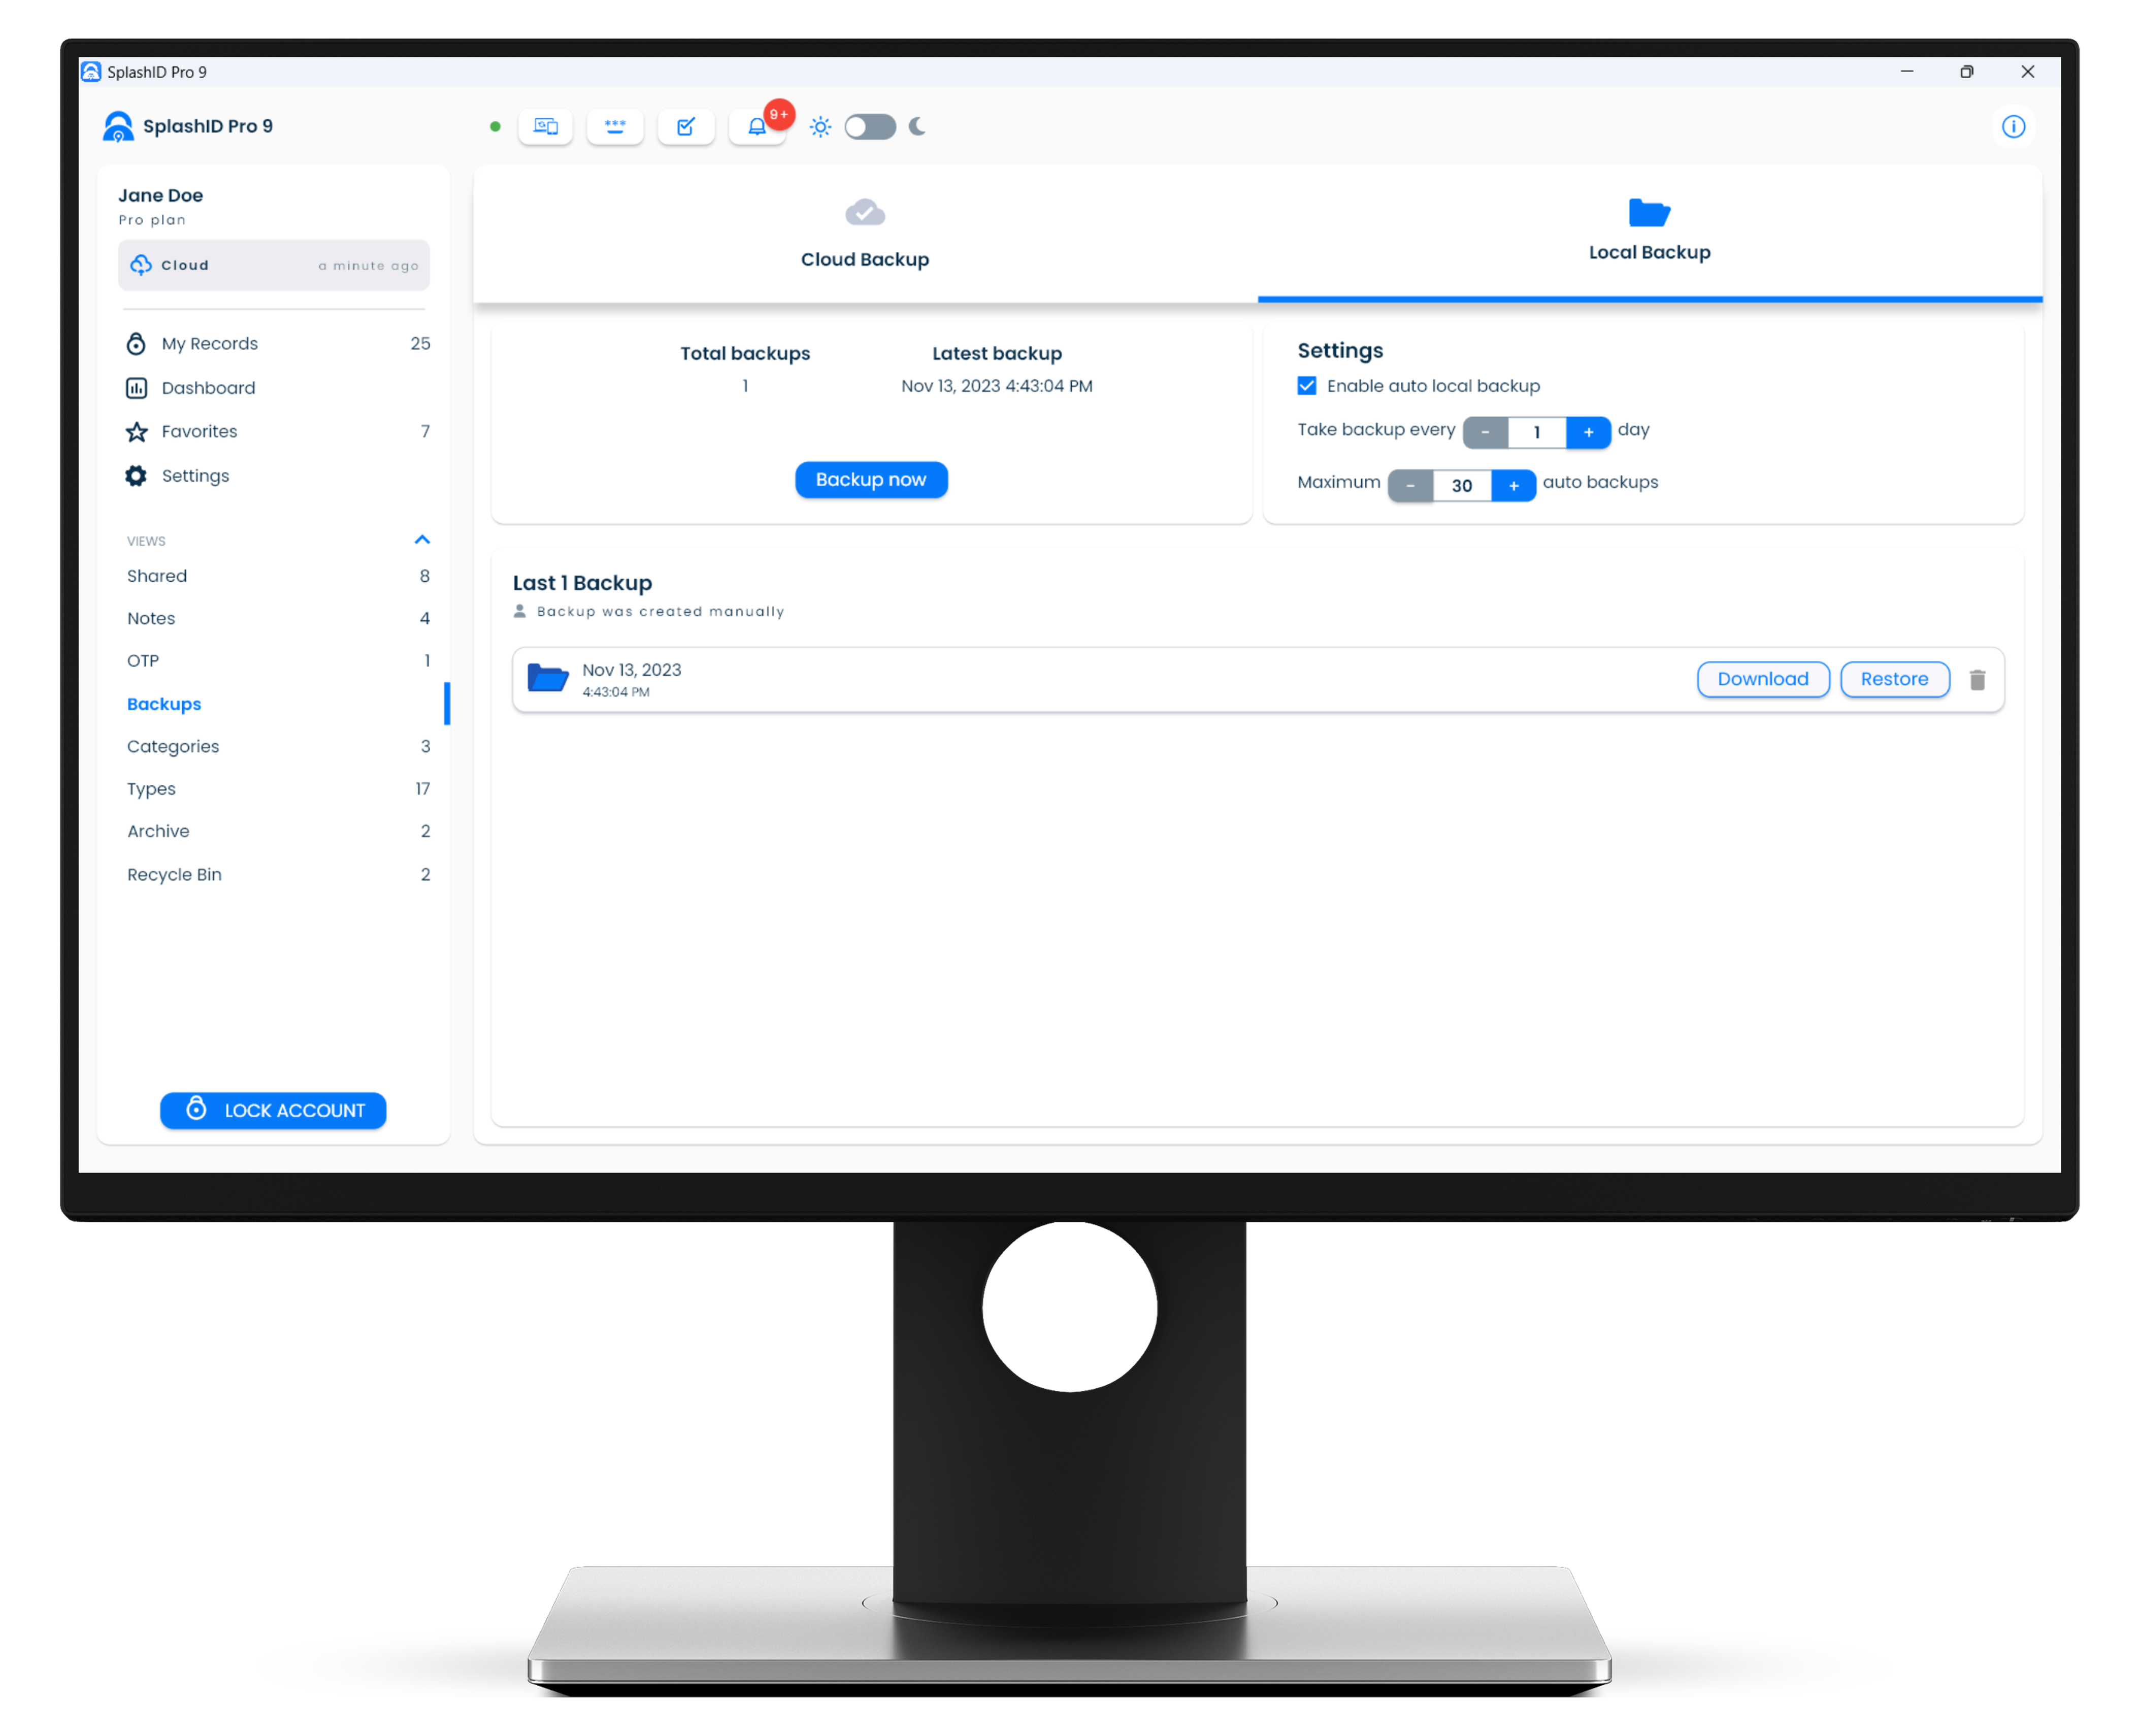
Backups screen
All your available backups can be viewed in the Backups screen. The Backups screen can be reached by clicking on the Backups link in the application menu.
| Mac | Windows |
|---|---|
  |
  |
| Android | iPhone |
|---|---|
  |
| iPad |
|---|
  |
Types of backup
SplashID Pro 9 users have access to two types of backups.
- Cloud backups
- Local backups
Shared records are not backed up
Only your personal records are backed up for your account.
Shared records are distributed across users with sharing information. Hence they are not backed up as part of your account backup.
A backup contains the following user information that is not shared with others.
- Records
- Categories
- Types
- Attachment in records
- User uploaded icons
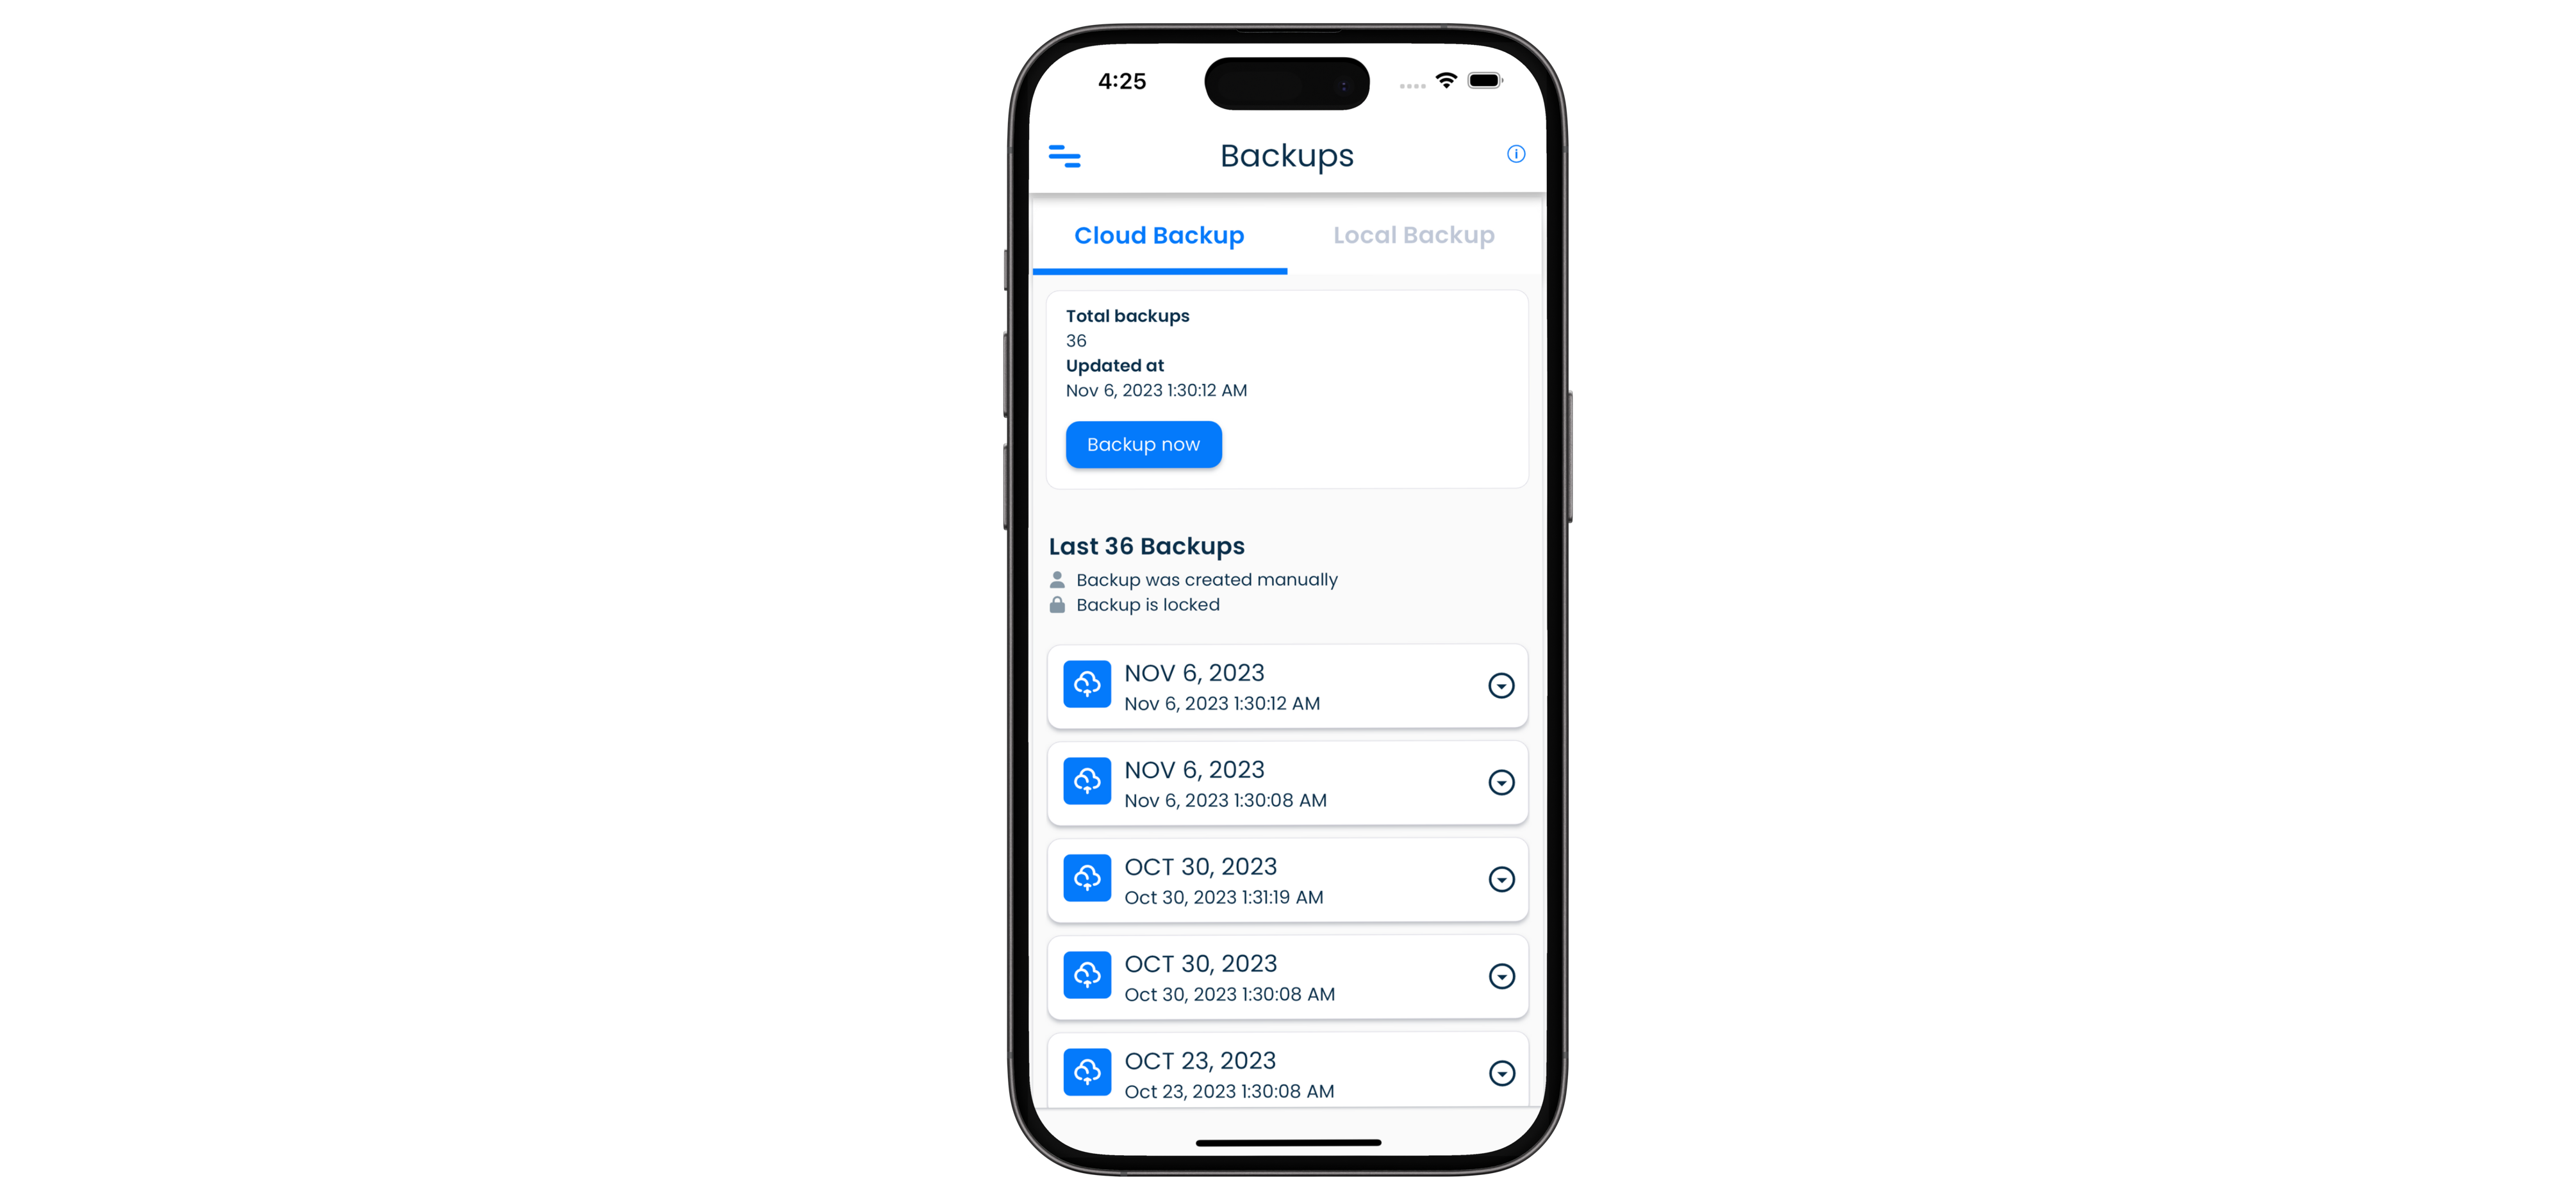
Cloud backups
| Mac | Windows |
|---|---|
|
|
| Android | iPhone |
|---|---|
|
| iPad |
|---|
|
Cloud backups is a (1) Pro feature
- Requires a paid SplashID Pro 9 license.
Cloud backups are taken every week automatically for Pro users who have their accounts set up for Cloud Sync. A maximum of 5 backups are available for the user at any given point in time.
Cloud sync users can also manually trigger a cloud backup. This can be done as follows.
- Go to the Backups screen by clicking or tapping on the Backups entry in the application menu.
- Click or tap on the Cloud Backup tab to see your cloud backups.
- Click or tap on the Backup now button to start a cloud backup manually.
There is a limit to the number of cloud backups
Older backups will get removed when the 5 backup limit is reached, and new backups are taken.
Lock a backup
You can lock a cloud backup to prevent it from being overwritten when a new backup is taken.
To lock a cloud backup do the following in the Cloud Backup section in the Backups screen.
- Locate the cloud backup in the displayed list.
- Click or tap on the Lock button in the backup entry.
- Wait till the lock is set on the backup.
Unlock a backup
You can unlock a previously locked cloud backup. This will remove the lock that was set on the backup, and allow it to be overwritten when a new backup is taken as per the backup schedule.
To unlock a cloud backup do the following in the Cloud Backup section in the Backups screen.
- Locate the locked cloud backup in the displayed list.
- Click or tap on the Unlock button in the backup entry.
- Wait till the lock is removed on the backup.
Restore a backup
If you need to remove all your existing information in your account, and restore them from a backup, then you need to use the Restore function.
Sign out from all other devices before a restore
Before you initiate a restore of a backup, it is mandatory that you sign out of your accounts on all other devices.
Alternately, you can uninstall SplashID Pro 9 from all your other devices before you proceed with the restore on your main device.
After the restore you can install SplashID Pro 9 on your other devices and sync them up to get the restored data.
Do the following to restore a cloud backup.
- Select the device that you want to perform the restore on.
- Log out of your account from all other devices.
- Locate the cloud backup in the displayed list on your device.
- Click or tap on the Restore button in the backup entry.
- Provide the required confirmation by entering your master password.
- Wait till the restore completes.
Delete a backup
An existing backup can be deleted, if you are sure that you no longer need it.
Do the following to delete a cloud backup.
- Locate the cloud backup in the displayed list on your device.
- Click or tap on the Trash icon in the backup entry.
- Provide the required confirmation by clicking or tapping on the Delete button.
- Wait till the backup is deleted.
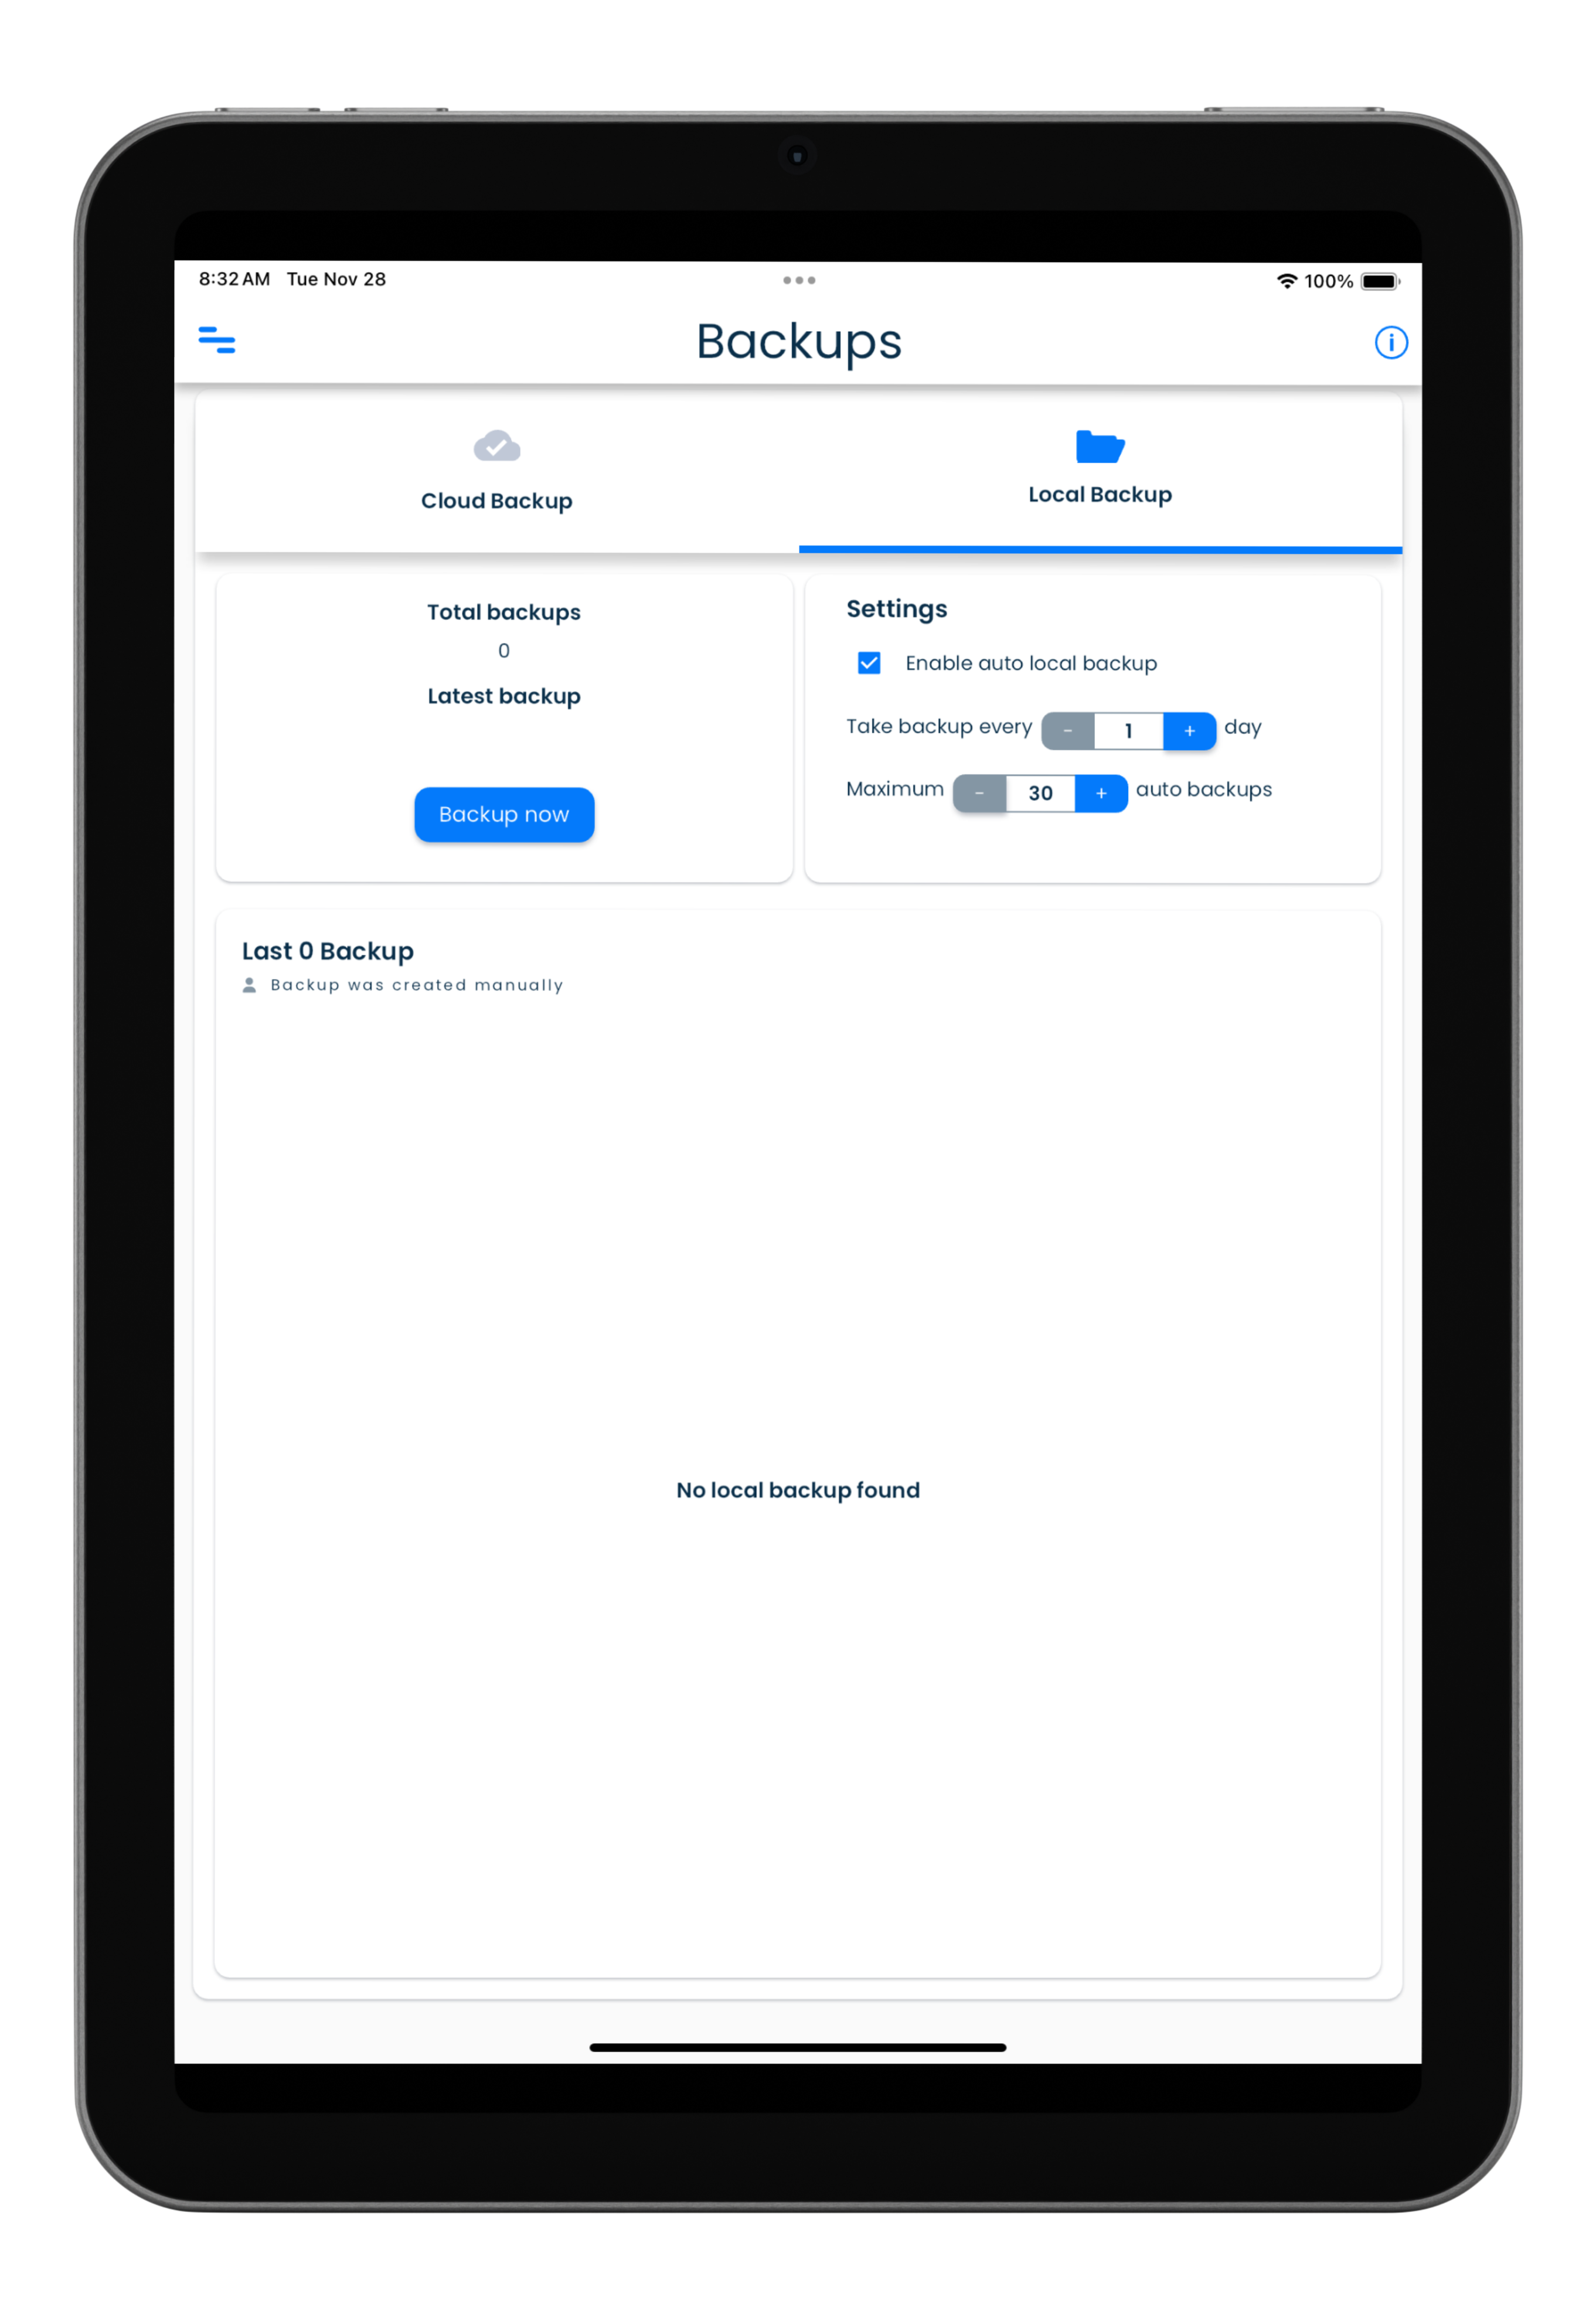
Local backups
Local backups are stored on the physical media storage available in devices. These type of backups are available for all the users irrespective of the sync type of the account.
| Mac | Windows |
|---|---|
|
|
| Android | iPhone |
|---|---|
|
| iPad |
|---|
|
Local backups are taken automatically on certain actions as listed below.
- Locking the app
- Logging out from the app
- Change of the Sync method
You can also manually trigger a local backup. This can be done as follows.
- Go to the Backups screen by clicking or tapping on the Backups entry in the application menu.
- Click or tap on the Local Backup tab to see your backups taken locally.
- Click or tap on the Backup now button to start a local backup manually.
Local backups on app usage
A local backup is taken only on the days the app is used. Usage means launching and signing in to your account in the app.
If you do not use the app on a given day, then there wont be any local backups taken for that day.
Settings
The local backups settings allow you to configure the following.
- Switching on or off the automatic local backups.
- The desired local backup frequency.
- Number of backups you want to retain on your local storage media.
By default, there will be a maximum of 30 local backups stored, with one being kept for each day you sign in to the application.
Local backups do not sync
Local backups remain on the device where they were taken, and do not sync across the users devices.
Lock a backup
You can lock a local backup to prevent it from being overwritten when a new backup is taken.
To lock a local backup do the following in the Local Backup section in the Backups screen.
- Locate the local backup in the displayed list.
- Click or tap on the Lock button in the backup entry.
- Wait till the lock is set on the backup.
Unlock a backup
You can unlock a previously locked local backup. This will remove the lock that was set on the backup, and allow it to be overwritten when a new backup is taken as per the backup schedule.
To unlock a local backup do the following in the Local Backup section in the Backups screen.
- Locate the locked local backup in the displayed list.
- Click or tap on the Unlock button in the backup entry.
- Wait till the lock is removed on the backup.
Restore a backup
If you need to remove all your existing information in your account, and restore them from a backup, then you need to use the Restore function.
Sign out from all other devices before a restore
Before you initiate a restore of a backup, it is mandatory that you sign out of your accounts on all other devices.
Alternately, you can uninstall SplashID Pro 9 from all your other devices before you proceed with the restore on your main device.
After the restore you can install SplashID Pro 9 on your other devices and sync them up to get the restored data.
Do the following to restore a local backup.
- Select the device that you want to perform the restore on.
- Log out of your account from all other devices.
- Locate the local backup in the displayed list on your device.
- Click or tap on the Restore button in the backup entry.
- Provide the required confirmation by entering your master password.
- Wait till the restore completes.
Delete a backup
An existing backup can be deleted, if you are sure that you no longer need it.
Do the following to delete a local backup.
- Locate the local backup in the displayed list on your device.
- Click or tap on the Trash icon in the backup entry.
- Provide the required confirmation by clicking or tapping on the Delete button.
- Wait till the backup is deleted.
Avoid manually deleting files on your desktop
Please do not access the restricted folders on your device or desktop.