Archiving and Deleting
Overview
Over time it is possible that some of the records you had used previously are no longer needed. You can then decide to move them out of the record views to keep your record lists concise and clean. Archiving and deletion of records help you to do this.
Archiving
Archiving of records in SplashID Pro 9 allows you to move records that are not needed to a separate area that can be accessed from the application menu. This helps in keeping your most relevant records in your main views.
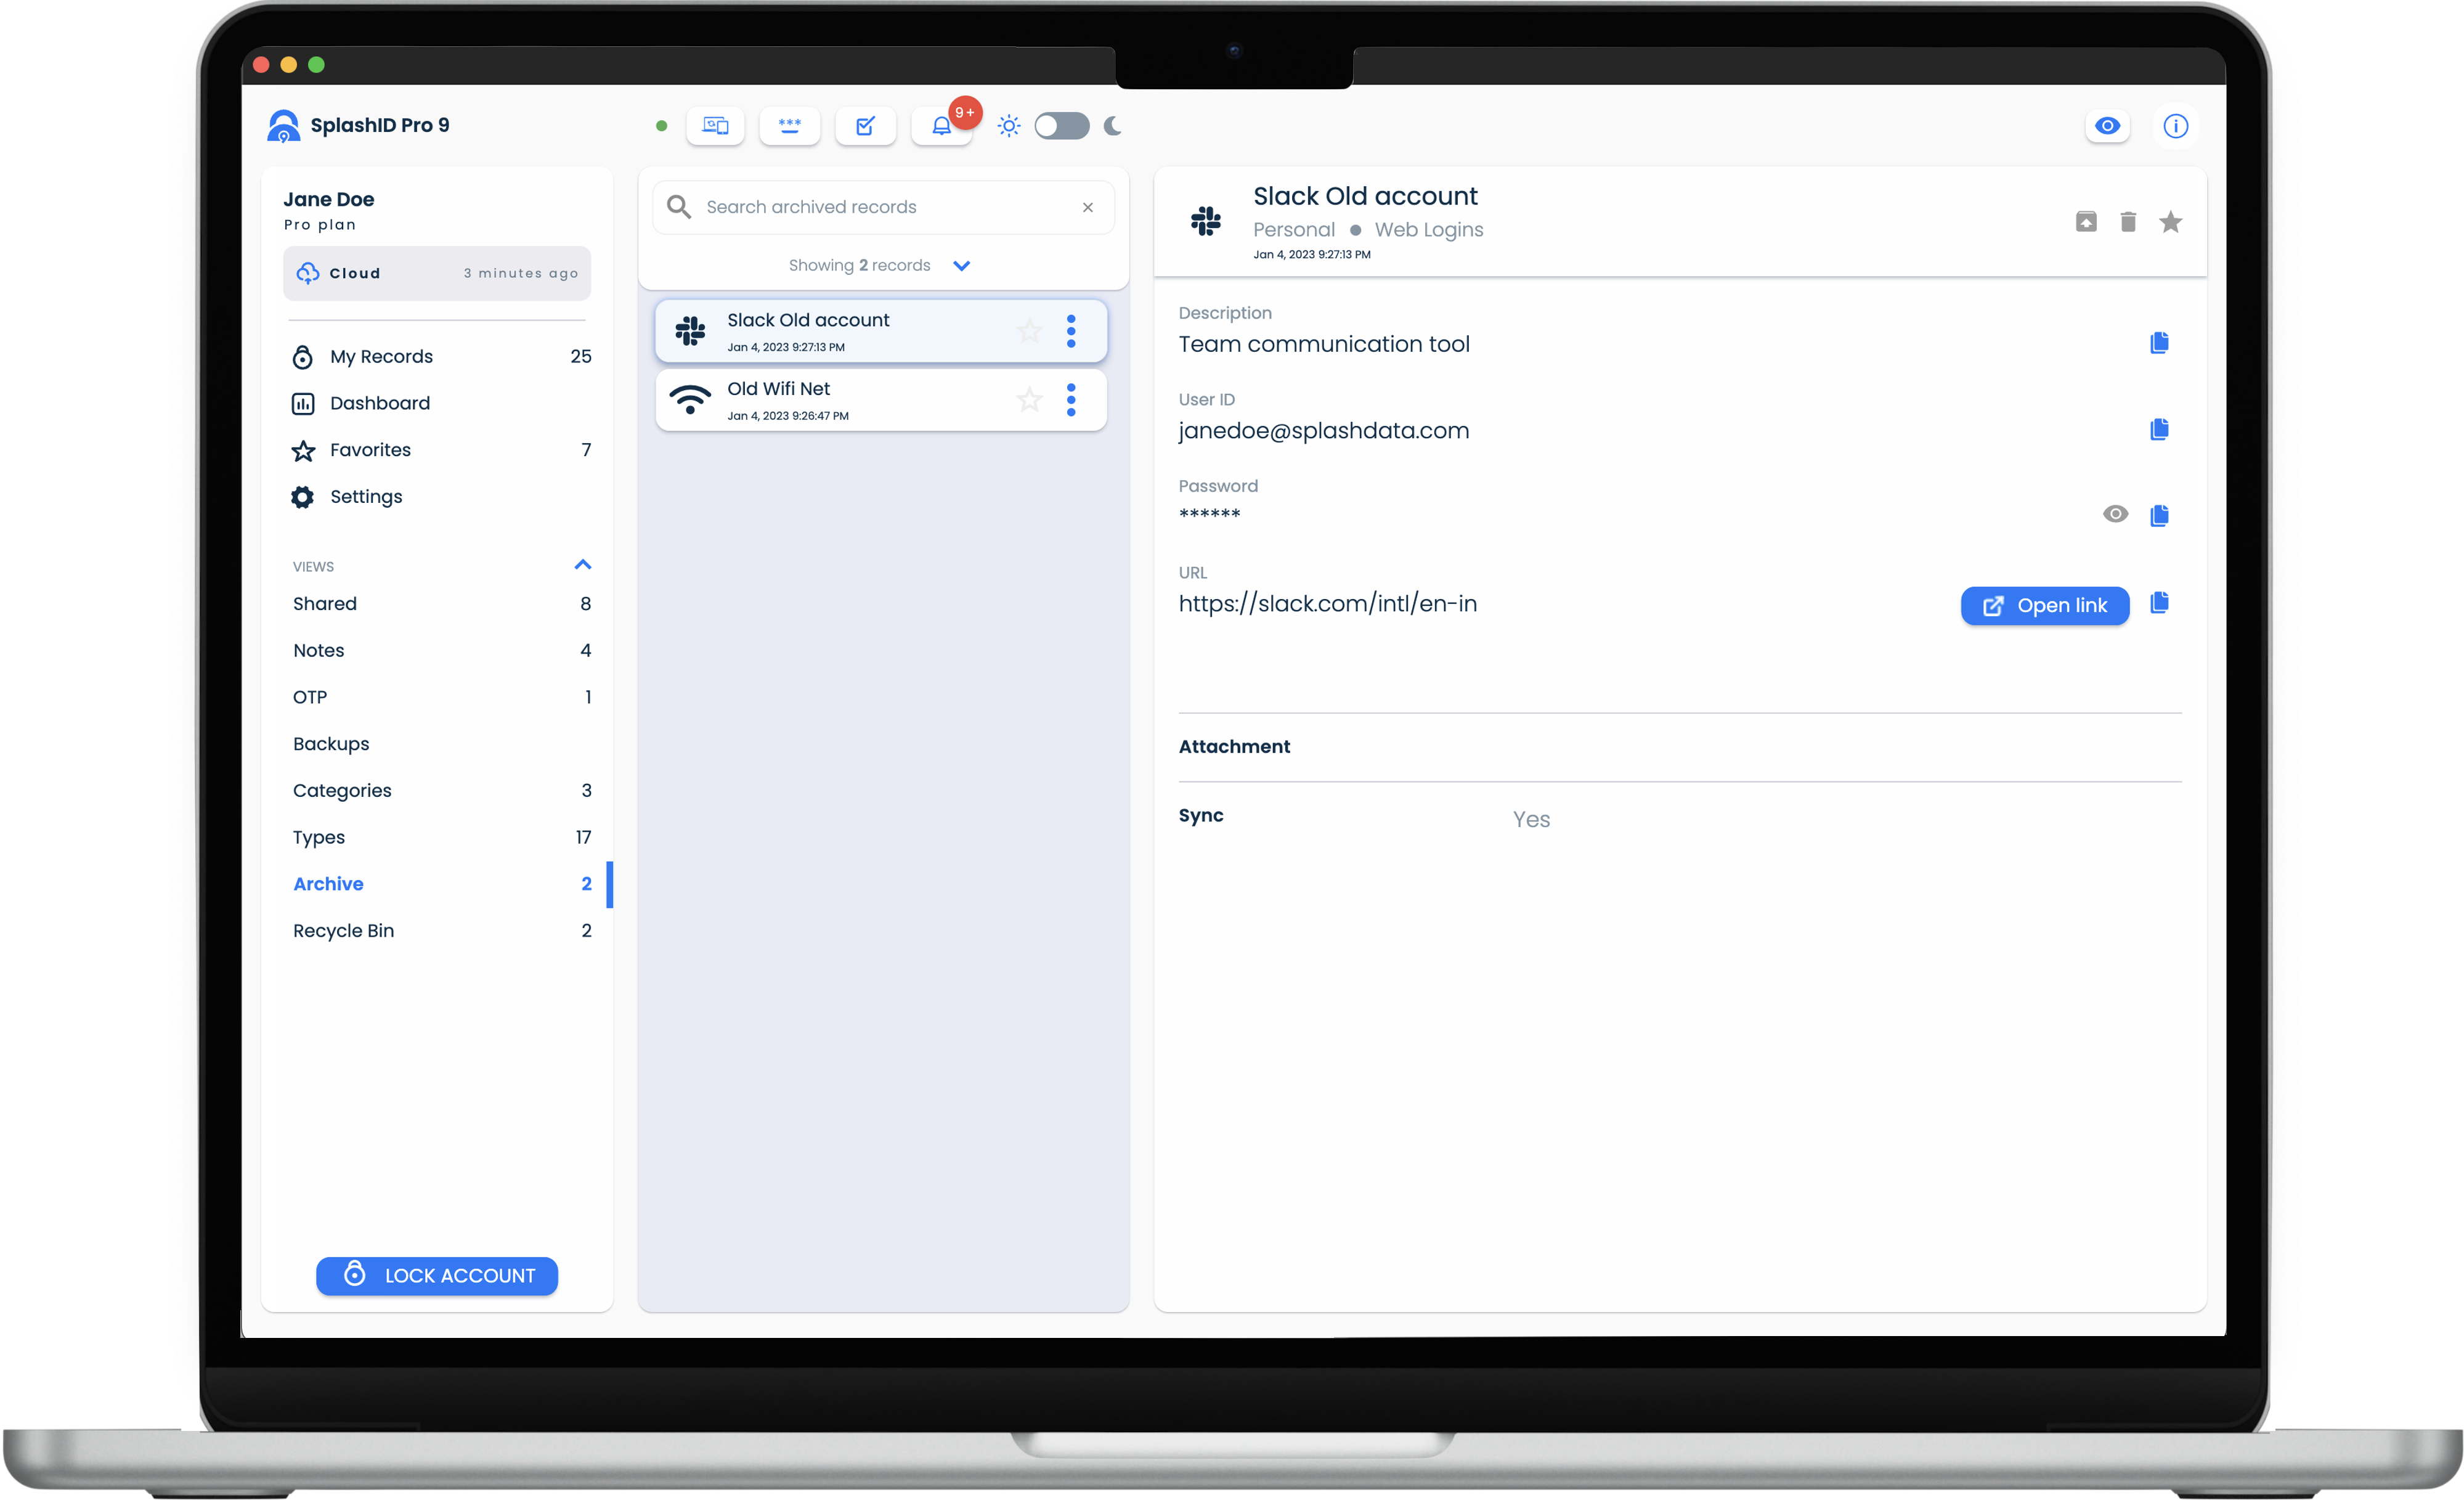
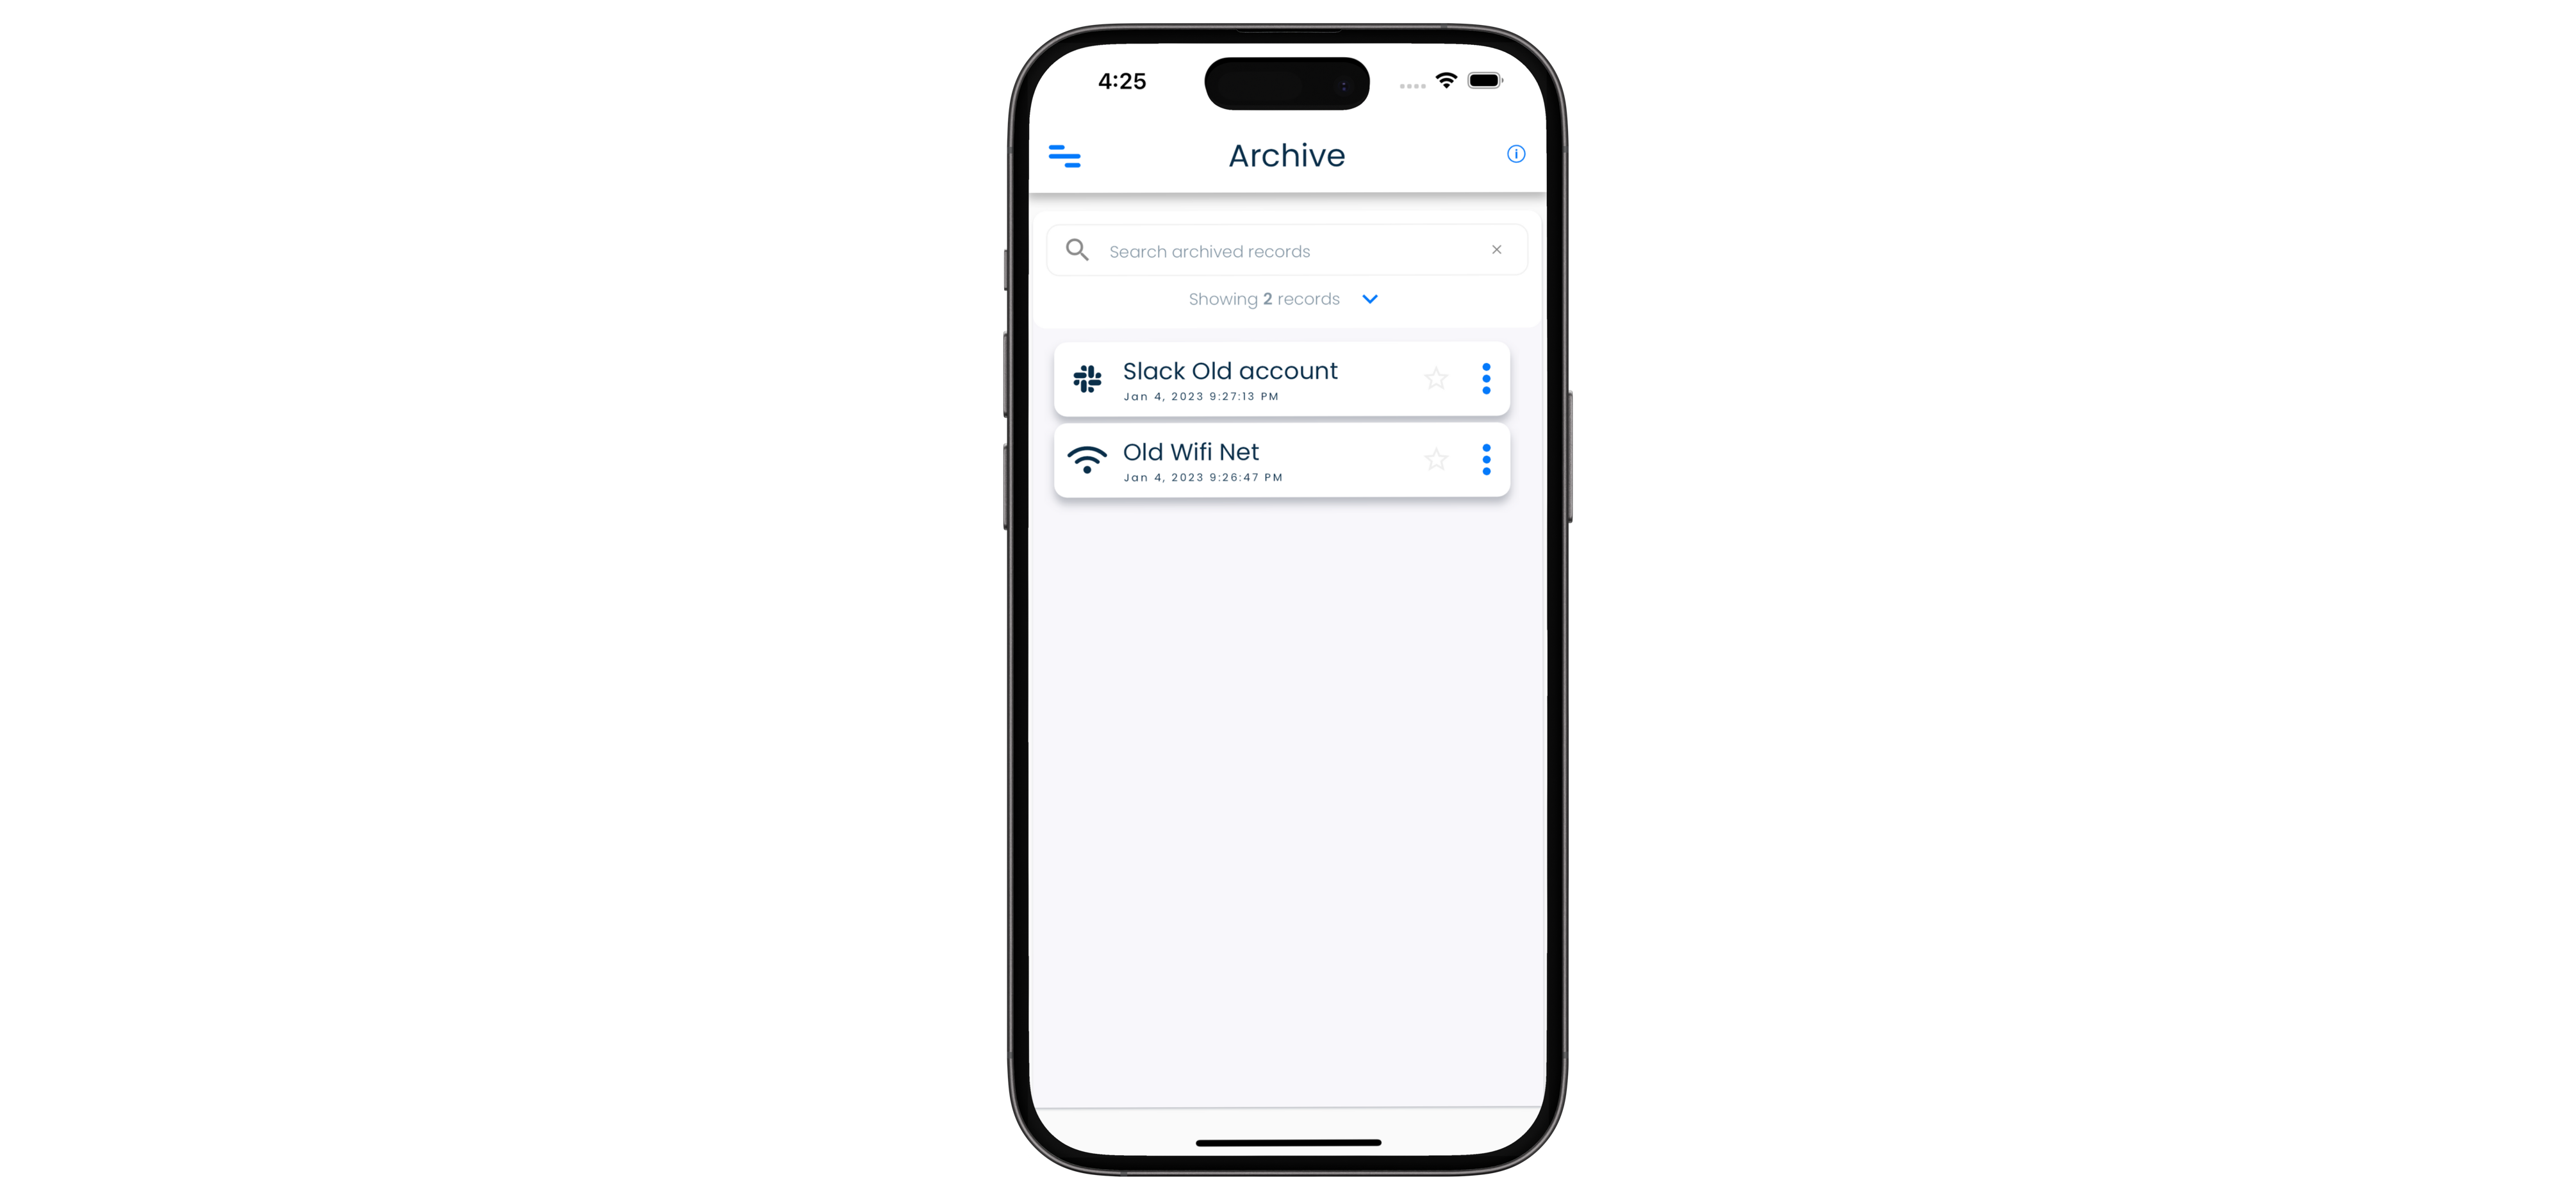
Archive screen
All your archived records can be viewed in the Archive screen. The Archive screen can be reached by clicking or tapping on the Archive link in the application menu.
Archived records sync across devices, and can be unarchived back to the personal record list if they are needed to be accessed regularly again.
Archived records cannot be edited. They will need to be unarchived first and then edited as regular records.
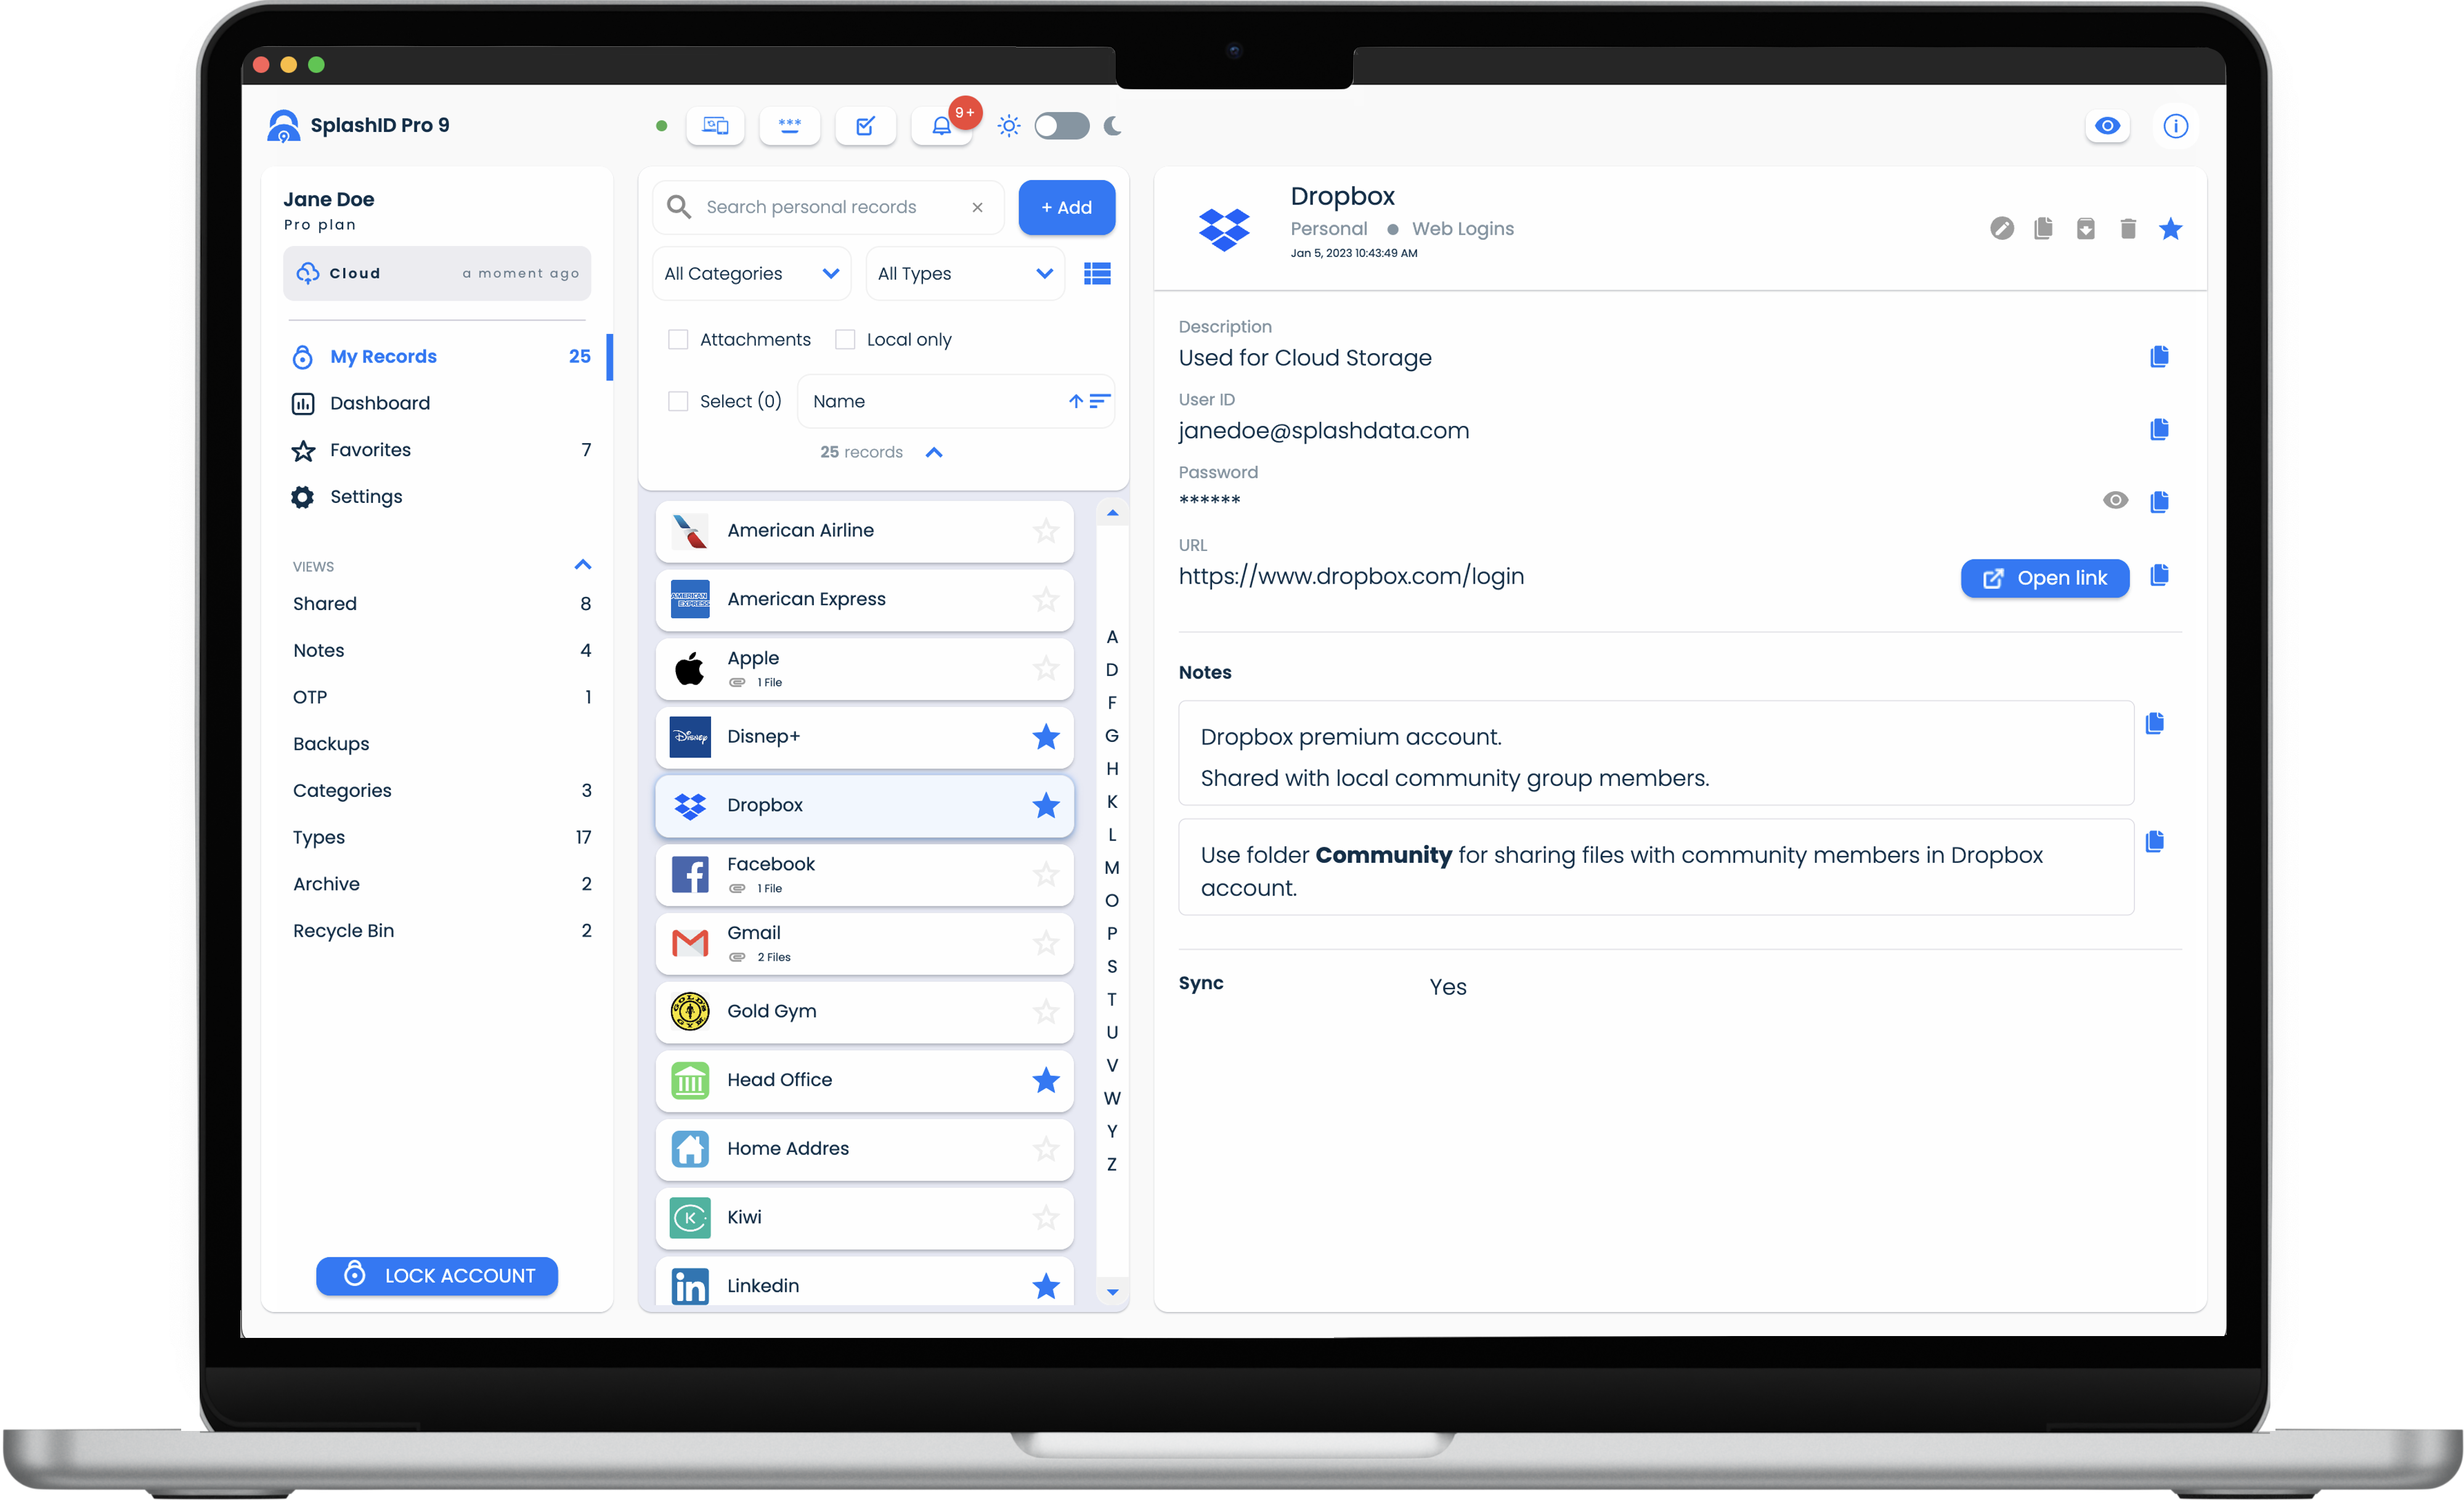
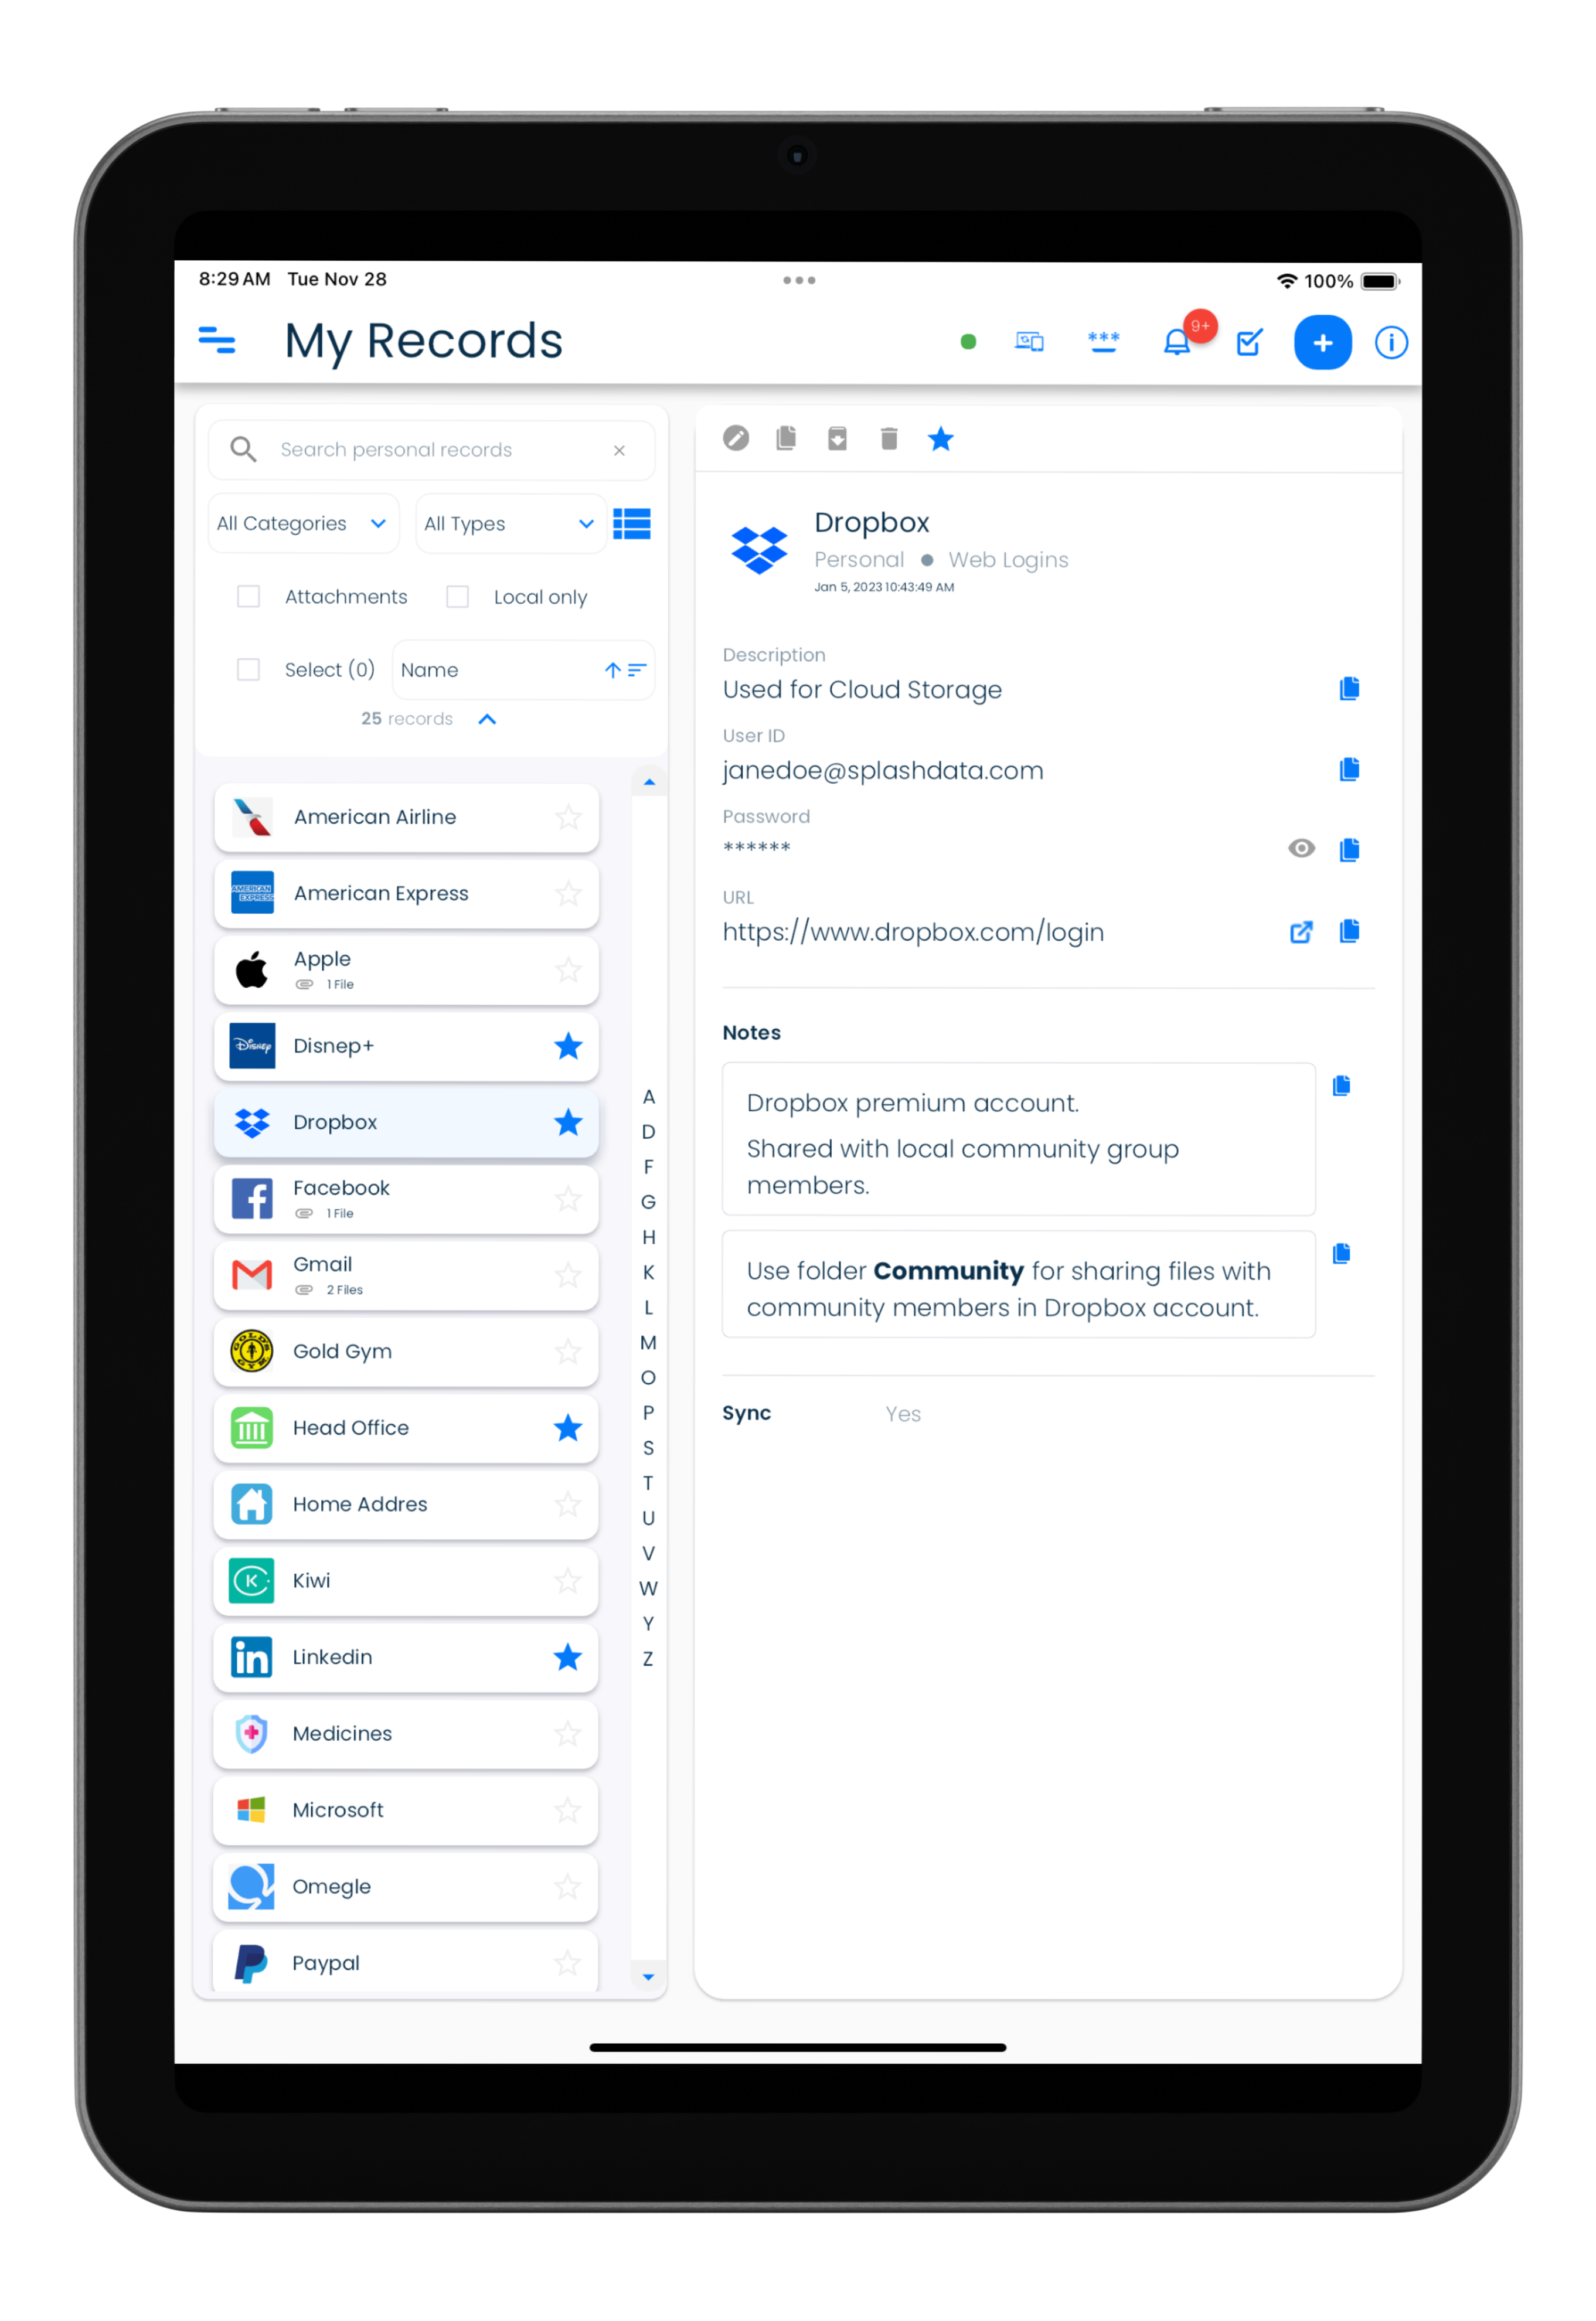
Archive a record
- Visit the My Records screen from the application menu.
- Select a record in the record list.
- Click or tap on the Archive icon in the record details header to archive the record.
- Confirm by clicking or tapping on the Archive button to proceed with archiving the record.
| Mac | Windows |
|---|---|
 |
 |
| Android | iPhone |
|---|---|
 |
| iPad |
|---|
 |
Unarchive a record
- Visit the Archive screen from the application menu.
- Select a record in the archived record list.
- Click or tap on the Unarchive icon in the record details header to unarchive the record.
- Confirm by clicking or tapping on the Unarchive button to proceed with archiving the record.
Click on the Archive icon in the record details header to archive a record.
| Mac | Windows |
|---|---|
 |
 |
Tap on the Archive icon in the record details header to archive a record.
| Android | iPhone |
|---|---|
 |
Tap on the Archive icon in the record details header to archive a record.
| iPad |
|---|
 |
Another way to unarchive a record
- Visit the Archive screen from the application menu.
- Locate the record in the archived record list.
- Click or tap on the three dots icon to bring up the list of actions.
- Click or tap on Unarchive option.
Archive multiple records
- Visit the My Records screen from the application menu.
- To select multiple records in the record list for archiving the records
- Expand the filter panel if it is collapsed by clicking or tapping on the Down arrow icon.
- Click or tap on the Select checkbox.
- Select the records that you want to archive.
- Click or tap on the three dots icon in the filter panel next to Select to bring up the list of actions.
- Click or tap on Archive option.
- Confirm by clicking or tapping on the Archive button to proceed with archiving the selected records.
Unarchive multiple records
- Visit the Archive screen from the application menu.
- To select multiple records in the record list for unarchiving
- Expand the filter panel if it is collapsed by clicking or tapping on the Down arrow icon.
- Click or tap on the Select checkbox.
- Select the records that you want to unarchive.
- Click or tap on the three dots icon in the filter panel next to Select to bring up the list of actions.
- Click or tap on Unarchive option.
- Confirm by clicking or tapping on the Unarchive button to proceed with archiving the selected records.
Deleting
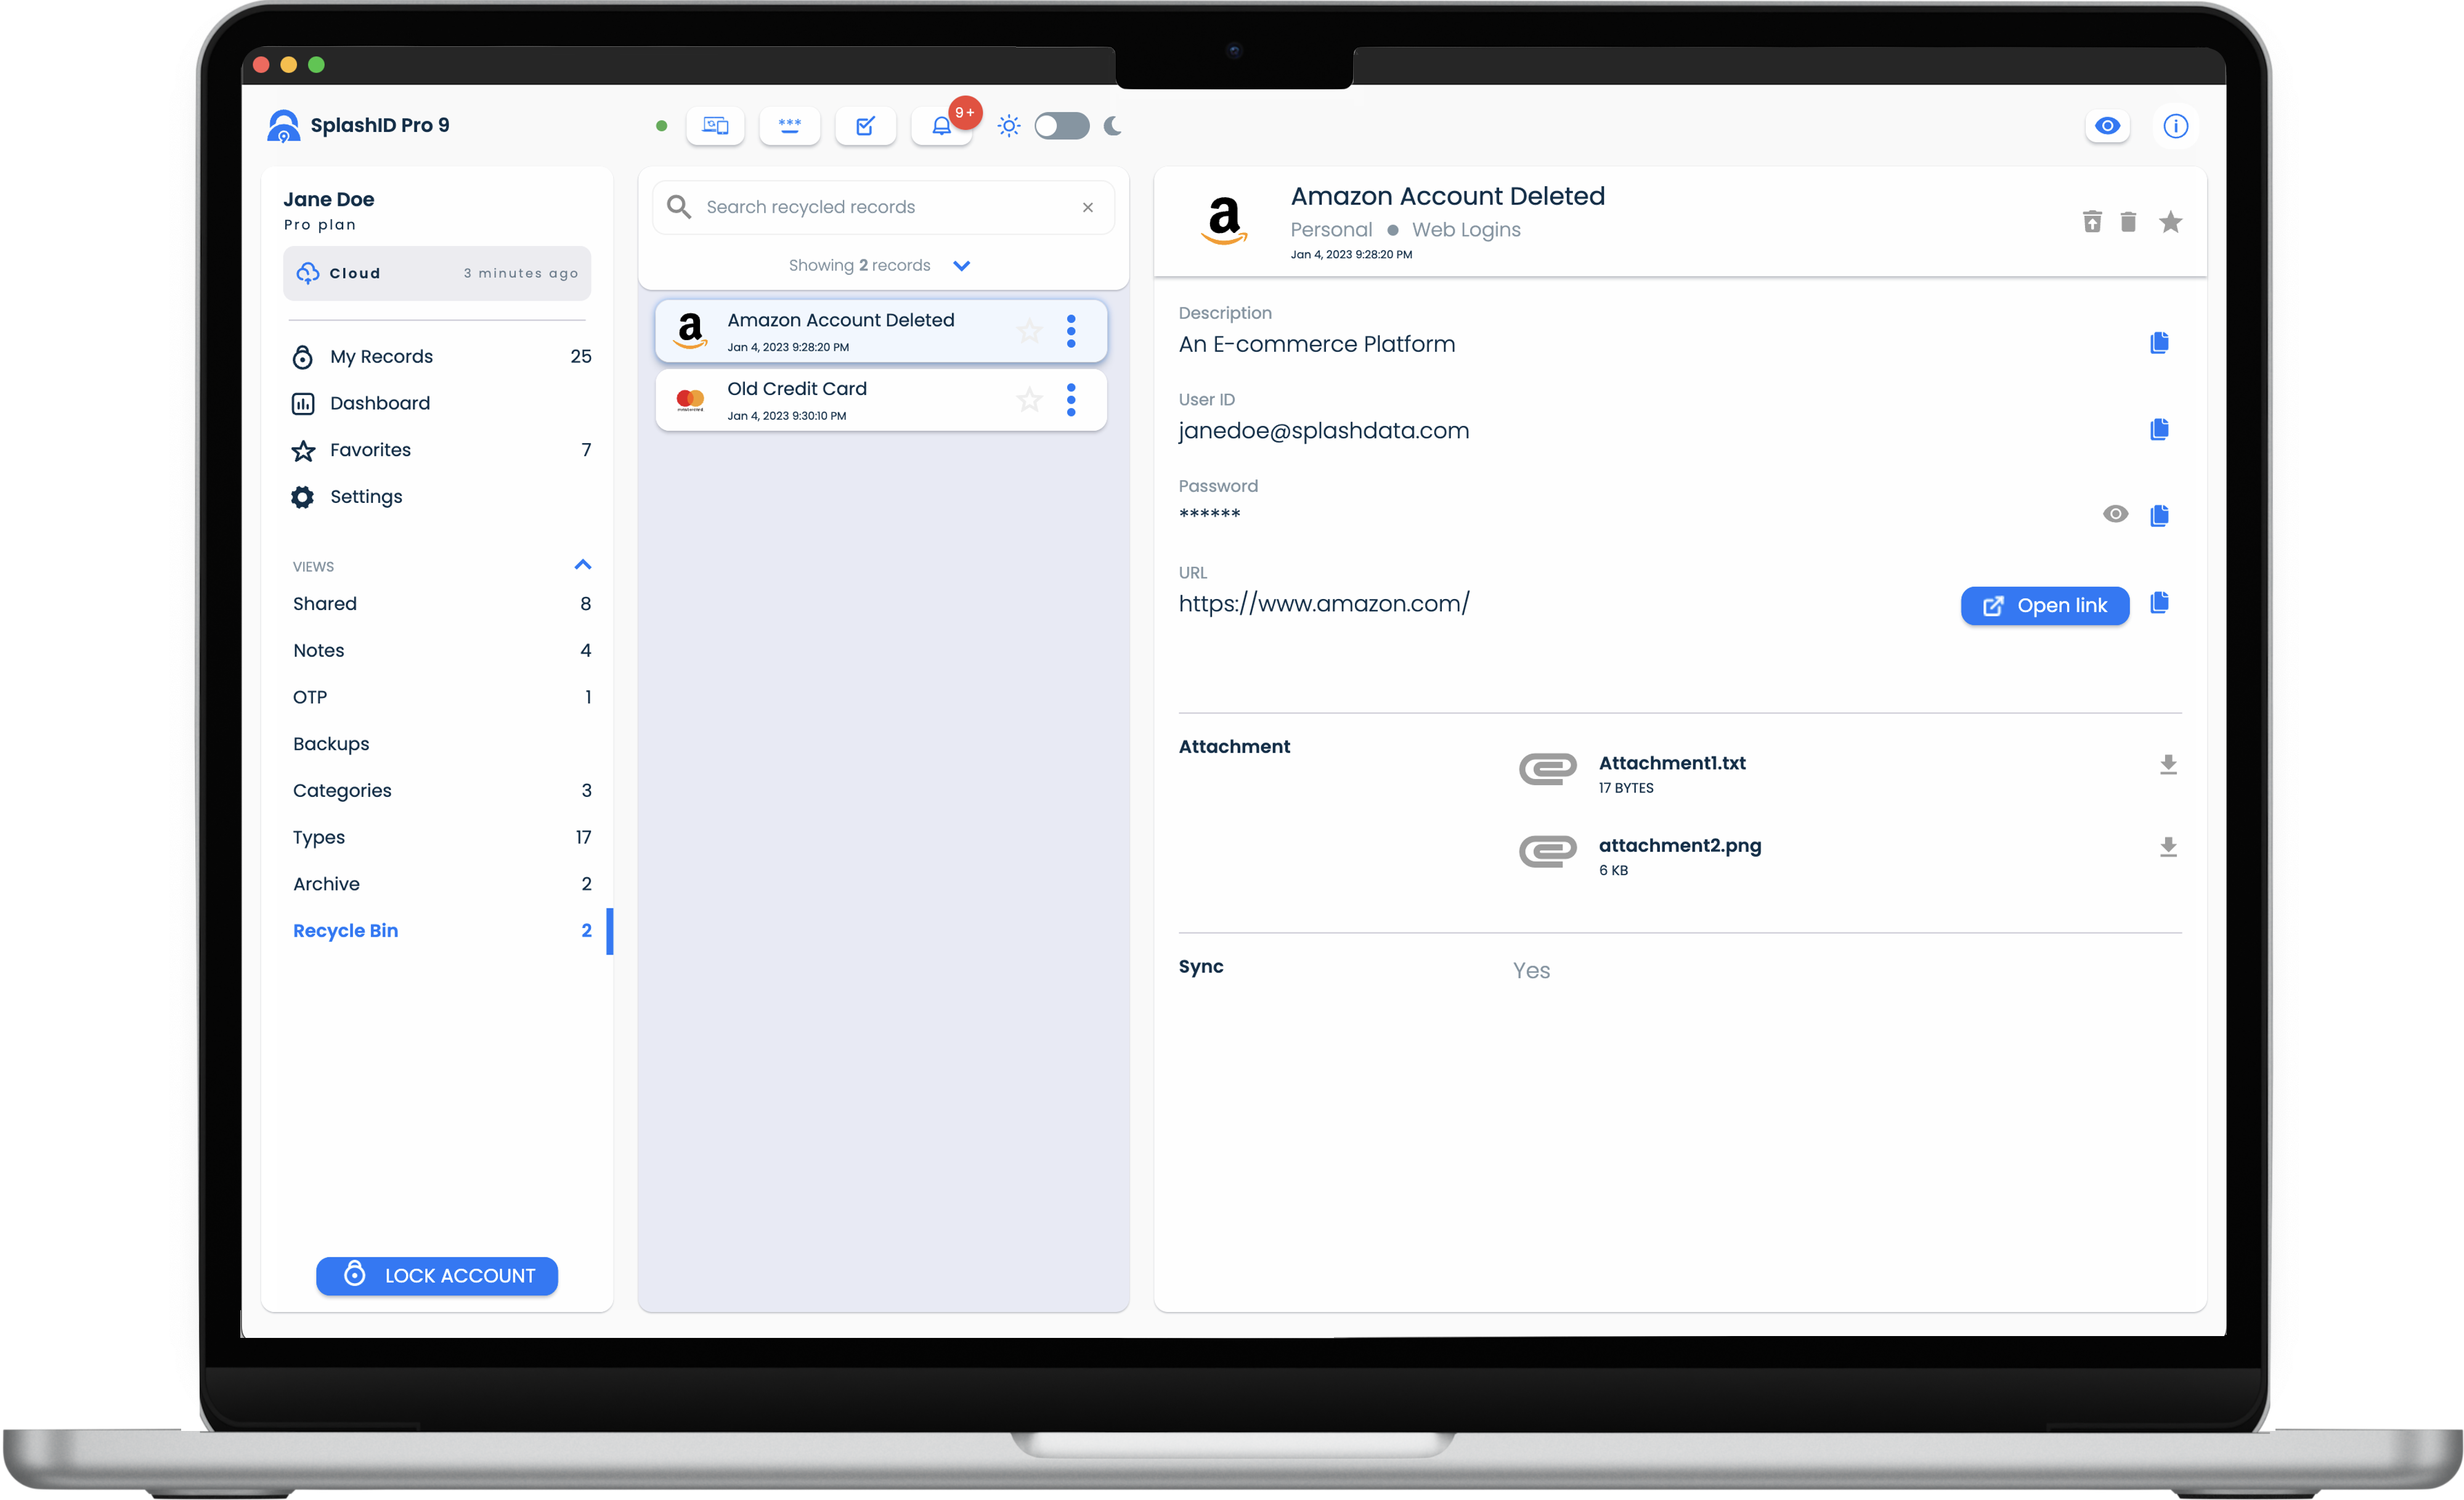
Deleting a record sends it to a Recycle Bin. The Recycle Bin is a temporary holding area for your deleted records till you decide what to do with them.
Recycle Bin screen
All your deleted records can be viewed in the Recycle Bin screen. The Recycle Bin screen can be reached by clicking on the Recycle Bin link in the application menu.
You can permanently delete them from the Recycle Bin if you are sure that you no longer need them.
Alternatively, you can restore a deleted record in the Recycle Bin to the personal record list.
Records in the Recycle Bin cannot be edited. They will need to be restored first and then edited as regular records.
Delete a record
- Visit the My Records screen from the application menu.
- Select a record in the record list.
- Click or tap on the Trash icon in the record details header to send a record to the Recycle Bin.
- Confirm by clicking or tapping on the Delete button to proceed with deleting the record.
| Mac | Windows |
|---|---|
|
|
| Android | iPhone |
|---|---|
| |
| iPad |
|---|
|
Restore a deleted record
- Visit the Recycle Bin screen from the application menu.
- Select a record in the record list in the Recycle Bin view.
- Click or tap on the Restore icon in the record details header to restore the record.
Click on the Delete icon in the record details header to send a record to the Recycle Bin.
| Mac | Windows |
|---|---|
 |
 |
Tap on the Delete icon in the record details header to send a record to the Recycle Bin.
| Android | iPhone |
|---|---|
 |
Tap on the Delete icon in the record details header to send a record to the Recycle Bin.
| iPad |
|---|
 |
Another way to restore a deleted record
- Visit the Recycle Bin screen from the application menu.
- Locate the record in the Recycle Bin record list.
- Click or tap on the three dots icon to bring up the list of actions.
- Click or tap on Restore option.
Delete multiple records
- Visit the My Records screen from the application menu.
- To select multiple records in the record list for deleting the records
- Expand the filter panel if it is collapsed by clicking or tapping on the Down arrow icon.
- Click or tap on the Select checkbox.
- Select the records that you want to delete.
- Click or tap on the three dots icon in the filter panel next to Select to bring up the list of actions.
- Click or tap on Delete option.
- Confirm by clicking or tapping on the Delete button to proceed with deleting the selected records.
Restore multiple records
- Visit the Recycle Bin screen from the application menu.
- To select multiple records in the record list for restoring
- Expand the filter panel if it is collapsed by clicking or tapping on the Down arrow icon.
- Click or tap on the Select checkbox.
- Select the records that you want to restore.
- Click or tap on the three dots icon in the filter panel next to Select to bring up the list of actions.
- Click or tap on Restore option.
- Confirm by clicking or tapping on the Restore button to proceed with restoring the selected records.
Deleting records permanently
- Visit the Recycle Bin screen from the application menu.
- Select a record in the record list in the Recycle Bin view.
- Click or tap on the Delete icon in the record details header to restore the record.
Click on the Delete icon in the record details header to send a record to the Recycle Bin.
| Mac | Windows |
|---|---|
|
|
Tap on the Delete icon in the record details header to send a record to the Recycle Bin.
| Android | iPhone |
|---|---|
|
Tap on the Delete icon in the record details header to send a record to the Recycle Bin.
| iPad |
|---|
|
Another way to permanently delete a record
- Visit the Recycle Bin screen from the application menu.
- Locate the record in the Recycle Bin record list.
- Click or tap on the three dots icon to bring up the list of actions.
- Click or tap on Delete option.